During the height of the pandemic, I decided to create videos using editing tutorials. Even though Premiere Pro has changed significantly since 2020, this video still relates to anyone beginning their video editing journey in Premier Pro.
Video Editing 101 is a 25-minute video tutorial. The rundown of this video is below.
:28-Recording media on a memory card and not editing off your memory card
1:00-Never edit video off a memory stick
1:55-Folder hierarchy
3:25-Naming conventions
4:04-External Hard Drives
5:21-Setting up Scratch Disk
8:30-buried preview files
9:28-Workspaces
10:04-Import into the project
11:11-Importing pointer not actual files
11:44- (~) key expanding a panel full frame
12:16-Project panels list view and icon view
12:35-Scrubbing video in the icon view in project panel
13:01-Naming convention of raw clips
13:56-Putting clips in the source monitor
14:34-J, K, L keyboards shortcuts
15:16-Playhead
15:20-Timecode
16:12-Mark IN
16:41-Mark OUT
16:57-Dragging 1st edit to New Item Icon
17:38-Labeling sequence
19:44-Up and down arrow keyboard shortcuts
20:11-Adjusting Mark IN and Mark OUT in the source panel
20:52-Dragging edit to timeline or insert function
21:45-Patch panel
23:44-Match-action edit
After you watch the 101 video, you are ready to edit a VO/SOT in Premiere Pro. The rundown of this video is below.
:30 – Making sure scratch disk is set
1:00 – Changing autosave
1:54 – Going through labeling of clips in the Project panel
3:55 – S.W.A.P – Synchronize Words and Pictures
4:30 – Writing the script and editing the VO simultaneously
5:58 – Starting a new sequence with the new item icon
6:12 – Title your VO sequence
6:46 – Zooming in on the timeline
7:17 – Going through my process of reading script and editing VO
7:25 – Using match action to for a cut
8:06 – (.) key – keyboard command to insert video
10:15 – Using into the frame to decide an edit
11:56 – Using motion to select and IN point
12:05 – 10 seconds of pad on your VO
13:31 – Editing the SOT
13:50 – Using timecode to set IN point
14:23 – Drag SOT to new item icon to create a new sequence
15:07 – Modify a stereo pair to dual mono in your raw video
16:51 – Using solo to listen to one audio track
17:20 – Using the option key to eliminate one channel
Editing is an important decision. Each edit should advance your story. So when do you make an edit? There are many reasons. Your story should have a rhythm, like a good song and beat. How do you find your rhythm? Here’s an idea: Follow the rhythm of the narration and the soundbites.
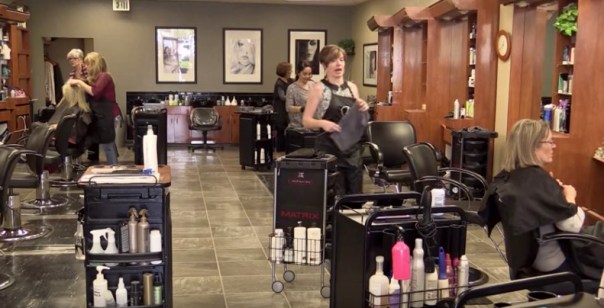
This is a story I produced for Emily Griffith Technical College, profiling a successful graduate. Throughout this story, I use the rhythm of my narration and Lindsay’s soundbites to help make edit decisions.
The 1st shot of the story is Lindsay walking to her salon station.
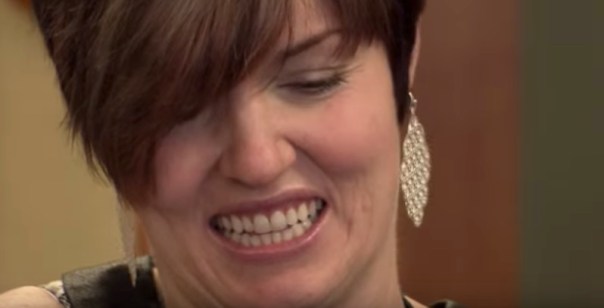
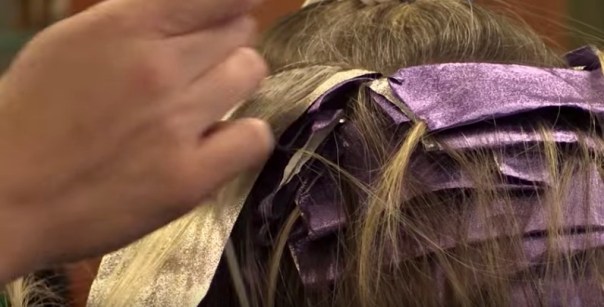
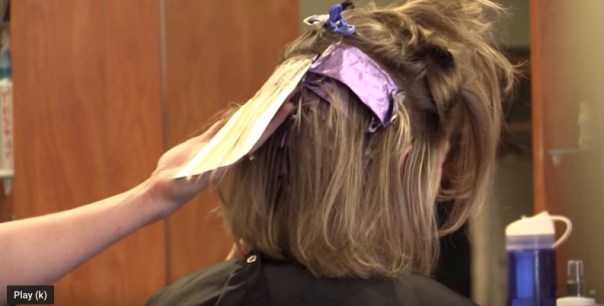
My narration is, “Lindsay Gore, preps for another client.” I make an edit on the word preps. The tight hair shot stays on the screen from :03 to :06.
Lindsay says, “It’s pretty crazy in here. We do a lot of business.” After she says here, I make an edit. I’m finding natural pauses to help me make edit decisions.
At: 09, my narrations is, “This full-service salon is Strandz hair studio.” My edit is on the word is. It is a natural moment of pause in the narration.
At: 13, she says, “I do own Strandz.” Then she says, “I bought it two years ago. I worked here for almost 9 years before I bought it. In the back of my mind, I always knew I would like owning my own salon, and I love it.” I make two edits based on the rhythm of her voice.
At: 19, she completes her thought, I bought it.
At: 21, she completes the thought; my own salon. I make an edit after salon, but before she starts her next thought, which is I love it.
My next narration at 22 is, “It takes a lot to run a business.”
I make an edit between a lot and run. I’m following the flow of my narration to help me decide when to make an edit.
At: 28, her soundbite is, “After I started at Emily Griffith, I had a cousin in Cosmetology school at another place.” I choose to make the edit after the word cousin. I felt a natural pause in the rhythm of her voice at that moment. I made the edit based on that.
Further, into that soundbite at :33, she completes a thought, “At another place.” After place, I make an edit.
Please watch the entire story and pay attention to when I make the decision and how the rhythm of narration and soundbites can help with edit decisions.
Want another example?
Here is a story by the 2016 NPPA Photographer of the year Rob Collett.
When you make your cut and move on to the next shot, there are so many reasons to consider. Ask yourself these questions as you make decisions.
Did someone complete a thought? If you apply thought completions to your edit decisions, you will be amazed at how it changes your editing.
Am I continuing a rhythm (pacing) with this edit-decision? Often turning off the sound and tapping a pencil on your desk every time you see an edit will help you discover pacing problems.
Am I disrupting the rhythm of the story with this cut, and is there a reason to do that? This is fun! Make a cut (or don’t) at a moment that creates a feeling that you want to convey to the audience like surprise, sadness, anger. Make your audience feel something because of your edit.
Am I cutting because the value of the shot is over? Sometimes it’s really this simple. Don’t be afraid to make a cut simply because the value of the shot is complete.
Am I cutting for match-action? I sometimes will make a decision about an edit for a match-action reason, and that will override other logic.
Does this cut, at the moment I choose to advance my story? This should override everything, really. Did it advance the story? If it doesn’t improve the story, then it should be for another reason, like rhythm.
What if I don’t make a cut at this moment? Sometimes the best edit is one you don’t make.
Lastly, how about you DON’T make an edit. What does this do to your story if you simply don’t make an edit at this point? Does this decision NOT to make a cut make your story better?
After Sex Offender is a story on my 2011 NPPA Editor of the Year entry.
This general news story I edited in just over an hour. The photographer was invited to follow the Adam Walsh Task Force rounding up sex offenders. Marking an In on your clip midmotion practically helps every edit you will ever make.
Our story starts with a medium shot of a Marshall knocking on a door.
The 2nd shot [:03] of the story is this a shot of a resident and the Marshall opening the screen door. Notice, I wait until the Marshall has already started opening the door. You are going to see edits taken midmotion A LOT throughout this story. I’m a big fan of midmotion
Starting an edit midmotion does several things. When you edit midmotion, the feeling the viewer gets is they are watching something un-staged. If we start the edit and then he opens the door, the act feels more staged. Like someone saying action and then it happening.
You want edits to hide as much of any staging a possible (None of this story was staged, and I never want the viewer to even remotely think that). Speaking of staging, watch reality TV for an excellent example of this. Most of you reading this already understand nearly all of reality TV isn’t all that real. How else could the camera be in the right places unless they knew what was going to happen? It’s the editing that makes reality TV seem so, well real. Editing midmotion, starting the edit after an action has begun, hides (which is what editing is supposed to do) a lot.
The third shot [:05] we’ve moved inside a residence. I use a J cut to help with the transition inside. The sound of the Marshall before the video of the marshall inside blends the edits together better.
The 4th shot [:08] is also inside. I don’t let movement stop in the previous shot (they are walking in, and the photographer following them is moving). I take the edit on this 4th shot just before the photographer walks into this bedroom. I use the movement of the photographer to help with my edit.
Notice a theme here.
There is movement/motion at the beginning of each shot. Something I also pay attention to is eye trace and eye movement. Notice the last frame of shot 3 and the first frame of shot 4 (previous two stills), the Marshalls are in the center of the frame. I’m placing the viewer’s eye exactly where I want it; in this case, in the center of the frame.
There is movement/motion at the beginning of each shot
Here is the last frame of shot 4.
Here is the first frame [:12] of the next shot I chose.
Both gentlemen are in the frame at the exact same spot. That’s no accident. When I get an opportunity to place the viewer’s eye exactly where I want them to be, I do it in an edit.
Again in this shot, I’m taking the edit midmotion.
This is a, I think it’s cool edit. I take the edit midmotion just like I have done before. I chose to start the edit on this frame, not because of eye movement but because the Marshall looks ‘cool.’ Coming out of the vehicle, he’s got this driving look on his face. He looks around while putting a piece of paper in his pocket. I think he just looks cool.
The next shot [:17] taken midmotion, and I utilize a J-cut here. Why? If we were following, we wouldn’t constantly be looking at him. Once we heard him say something, we would turn our heads and look at him. The J-cut imitates that (imitate the eye).
The next 7 edits are all taken midmotion. I don’t do that on this shot [:44], however.
Why? Well, he has a caught criminal. He is just sitting there. The action of him sitting in handcuffs would draw your eye alone.
Another J-cut [:46] here. Why? Well, you would be looking at the arrested individuals, wouldn’t you? You would hear the Marshall speak and then turn to look at him. That’s why a J-cut is here.
For this edit [:50], notice I time the edit so that he puts the head down just as the Marshall is saying they admitted to being here illegally.
In the next 4 shots, there is not much going on, so my emphasis on movement isn’t as important. The Marshall is also doing some interviewing, so I let those shots play out.
In the final six shots, there isn’t an emphasis on movement as well. The Marshalls have wrapped up today’s work. I’m merely looking for a shot to help convey that as much as possible. I’m also looking for shots that look ‘cool.’ I particularly like this one.
I like the rack focus [1:05] from the back of the vest to the Marshall.
It really is the simple things that make you a better editor.
This blog’s primary focus is on the editing of stories. I would like to point out a few things about the videography.
1. The photographer stayed with either a medium or wide shot whenever an opportunity to catch an apprehension on camera. An excellent idea.
2. Only when the environment was under control, like after an apprehension did the photographer shoot tight shots or try to get sequences.
You see match cuts all the time; movies, television shows, and commercials contain match cuts.
Take this Heineken commercial for example
At [:13], you see match cut of the gentlemen in pink juggling the beer in glasses.
At [:18] is a match cut of the gentlemen throwing beer bottles from the stage to the men on the couch.
At [:30] is a match cut of a man opening bottles of beer.
Match cuts are an edit that connects two shots together via the action within the two shots. Editors who are meticulous with match action understand how edits work.
The idea is to edit to shots together using the action within the shot. Having movement in both shots, editing on that movement hides the edit.
In the commercial you see
• The action continues in two uniquely composed shots • It appears as if the shots are done with two different cameras rolling at the same time • It’s an easy way to create a very clean looking sequence • The match cut edit hides that there is, in fact, an edit
Editing two shots together on a movement will often make the edit invisible. Good edits are invisible edits. Good edits are edits your audience doesn’t notice.
Our story for this post is Michaela.
There a lot of match action in this story. I mean a ton. I mean…well you get the point.
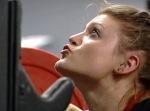
The beginning of the story is a sequence of Michaela and her mom in the kitchen. Within that sequence I use match cut from the shot of Michaela tight at [:11]
to the wide shot of her and her mom in the kitchen.
Match cuts make edits very smooth. Match cuts are not always made with a person, you can use an item.
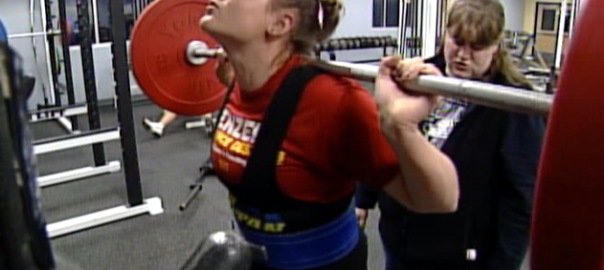
In this next example, you see Michaela lifting the weights and then begin to put them down. She doesn’t complete the action of the weights going to the ground in this shot.
In the next shot, you see the weights land on the ground completing the action.
When the barbell leaves the frame, your eye naturally dropdown. Your eye expects to see the barbell hit the floor. The match cut is very natural.
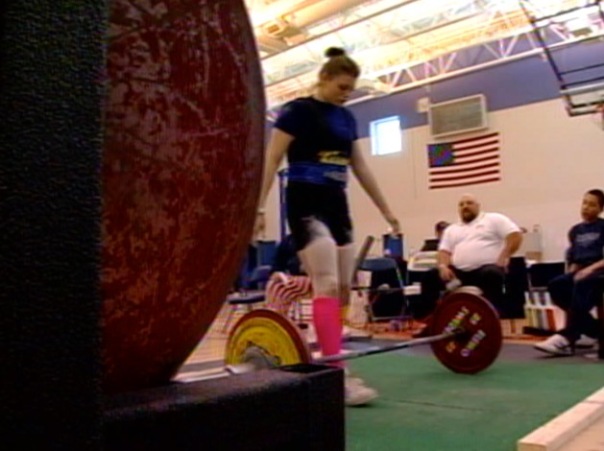
Here is another match cut beginning with the barbell on the ground, and then Michaela picks it up.
I make an edit while the barbell is moving up and out of frame. The next shot, you don’t see the barbell right away. You do see Michaela coming up and then the barbell. So the action completes in the second shot of the sequence.
It looks like what you would see if you were in the room with her. This is one of the tools to help take your audience to your story. When Michaela drops the barbell, I again have a match action shot at [:38].
This is a simple three-shot sequence with match cuts connecting each shot together.
Here is another three-shot sequence with each edit connected with match action [:42].
Michaela comes up with a machine, takes the weight, and does a squat.
Starting at [1:22], my match cuts go into overdrive. Can you tell me how much I like to match cutting?
I try to use Michaela’s movement of starting and stopping points for my edits. Here’s another one at [1:44]
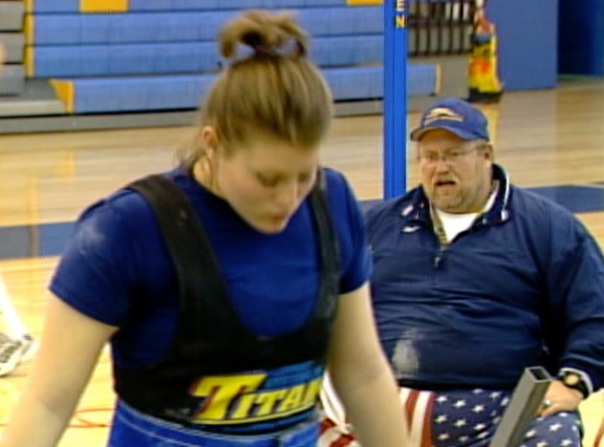
Michaela’s entire family is at the weight-lifting competition. From [1:41] to [2:03] is all match action except for one cutaway of Michaela’s mom.
I had a lot of fun putting this story together. I had even more for honing my match cut editing abilities.
The guidelines of six come from the Rule of six. What’s the Rule of six, you ask?
It’s an editing concept I first learned about reading In The Blink of An Eye.
Walter Murch is a film editor for Apocalypse Now, The Godfather III, and many other films.
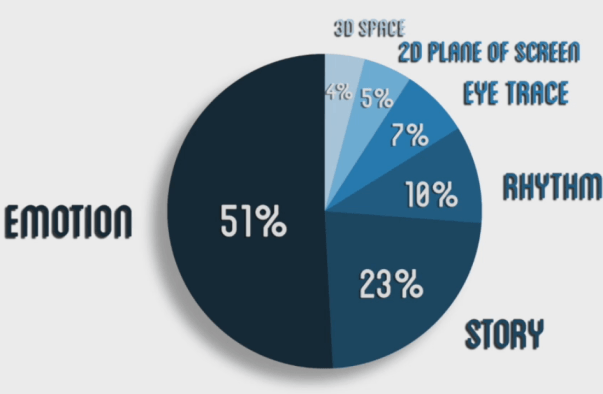
The Rule of six is a list of rules you should follow with each cut you make.
1) Emotion 2) Story 3) Rhythm or pacing 4) Eye-trace (leading or directing the eye to what the viewer should look at) 5) Two-dimensional plane of the screen (or screen direction/180 rule) 6) Three-dimensional space of action (or continuity)
This list was developed for film. However, you can apply it to all visual storytelling. It’s a logic to the edit decisions you make every day. I’ve broken down a story you can see the Rule of six in action.
I’m not a big fan of rules. I prefer guidelines.
So, from here on out, we’ll refer to this as The Guidelines of Six in Video Editing. I use this in news, program, documentary, corporate, and commercial/promotional editing.
This is a segment from the Extreme Kellie franchise I edited at KDVR/KWGN.
The story starts with an aerial of paragliders.
The next shot, the shadow of the paraglider.
The action of the shot is happening at the same position in both shots. The action is just left of center, that’s not by accident. That’s me wanting you to look at precisely what I want you to look at.
I’m using rule #4, eye-trace (leading or directing the eye to what the viewer should look at).
The next shot I’m cutting for rhythm/pacing, rule #3.
I always like to think about eye trace (rule #4) when I’m editing. Every shot won’t work, and nor should you try and make every shot work. If you went for eye trace in each shot, you’d spend a lot of time looking and not a lot of time cutting. I’m cutting for rhythm or pacing here. I wanna maintain an individual pace, and this rule overrides eye trace. Oh yeah, you should follow the guidelines in order. Keeps these rules (or guidelines as I like to call them) at the top of your mind as you cut.
Heck, maybe you should print this out and paste in on you NLE for future edits.
What’s this mean? You should cut for emotion over everything. Think about your last edit and how it would have been different in your followed the guidelines of six.
The number #1 guidelines for storytelling is emotion.
Remember, emotion overrides all.
I don’t care if the video is blue if the shot is shaky if there is a swish pan to get to the emotion.
Never cut away from emotion, always cut to emotion.
Guideline #2 is the story. Really start thinking about this Rule. I mean really, really start thinking about this Rule. Did you advance your story? You should always be advancing your story. If you not, then see if the reason why you’re making a cut falls under guidelines 3,4,5 or 6.
Back to the video, we go.
I do a series of faster edits at [:08] for rhythm. I’m simply cutting to the music.
Notice the paragliders are mostly centered in this series of shots. I always have eye trace in the back of my thoughts.
Now here’s a spot that you could argue that rhythm, guideline 3, is an over-riding story, guideline 2. The shots are still relevant to the story. I’m not showing crazy tights shot of the sky? I’m showing paragliders. Story and rhythm are working together here.
Back to eye trace here at [:11] Paragliders are just above center and just to the left.
In that same spot just above center and to the left, Kelly’s head (The instructor Kelly, not the anchor Kellie); more eye trace in action.
The shot at [:23] is for rhythm and advancing the story.
As you can see, no eye trace into the edit. But, out of the edit take a look at [:27]
You are looking at the paraglider. Your eyes are looking just left of the center frame. I’m getting you ready to look at what I want you to, which is Kelly (instructor) putting the harness on Kellie (anchor).
Ok, I’ve to think you’ve got the whole eye trace thing. So, I’m not going to point those out anymore.
The shot from Kellie and Kelly wide above to the shot tight shot Kellie putting on the backpack fall under two dimensional plane of Screen (screen direction), or guideline #5. Kellie (anchor) is on the left, and Kelly (the instructor) is on the right.
I maintain screen direction, but I override continuity rule #6. Do you see how Kellie (anchor) turned at [:28]. She facing left at [:28]
but facing right in the tight shot at [:29]
I maintain screen direction, but I break continuity.
A word about guideline #6, three-dimensional space of action, or continuity. Continuity is the guideline that is incredibly hard to maintain in broadcast news editing. The easiest way to get around continuity is tight shots.
From [:45] to [:59] I’m just thinking about guideline 4 or screen direction. This is a sequence of getting the paragliders up. I’m also advancing the story, guideline 2.
At [:59] I cut to a shot of Kellie giving the camera a thumbs up.
This shot is for emotion, guideline #1. I’m showing Kellie’s enthusiasm.
From [1:00] to [1:10], I’m thinking about rhythm.
At [1:11], Kellie talks about being nervous.
Emotion, guideline #1. I’m NOT going to make a cut even though the photographer adjusts the iris during the shot. I break rhythm too by keeping this shot up so long.
Emotion over-riding all.
From [1:20] to [1:44], I’m cutting for rhythm and for the story.
This slideshow requires JavaScript.
At [1:45], Kellie shows emotion, and I stay with it.
There are several more examples of the guidelines of six and how it implies to each edit. I invite you to watch the piece and really look at each edit and ask yourself, why did he do that?
Rarely is one edit made based on one guideline; more often, several rules are in play.
I do want to point out something toward the end of the story.
These 3 shots are jump cuts.
I don’t care.
Each shot has emotion. No need to cut away from it. This is another example of emotion over-riding all.
The story you are about to watch put me on the map. Several talented people took notice of my developing skills. I won several awards for this story. You should have a story like this, a story everyone notices and lives for a few years. Ok, enough about that.
This is an educational blog, so what can you learn from a story like this. You can learn that the basic elements we use every day can turn into an effect. Yes, the cut can be an effect. This was edited in a tape-to-tape edit bay back in 1999.
The cut is the device storytellers use most often. I’d guess over 95% of the content you see in film, television, and the web uses cuts.
We often see storytellers use effects to enhance a story. Many of us know what effects our NLE are capable of and can grab any one of the numerous effects to enhance a story.
New York Street Boys is an effect driven story, except the effect is simply a cut.
Our story begins at [:02]. It starts with a wide shot of crowd gathered.
After that shot, we have 44 cuts in less than 8 seconds. All of these cuts are edited to the beat. I’m creating an effect by merely cutting quickly.
I understand I wanted to have fun with this story. Rarely you ever get an edit that just calls out for a certain kind of edit. I could have easily edited this with significantly fewer edits and had a good story. This is a case of wanting the edits to enhance the overall experience of the story.
There are only 3 shots that are wide shots within that series of cuts. Your eye probably only recognized two of those wide shots. I did that because of the way the brain process information. The brain can only process so much information at a time. If you’re going to use this type of editing and you still want the viewer to gather information about the story, tight shots are the way to go.
Try to use a vastly different shot. Wide and tight and/or different colors or diverse elements. This will help the viewer’s eye and getting information.
I’ve established the style in which I’m going to tell the story right from the beginning. I’m going to use quick cuts, often single frame edits. Does this represent the way the eye would work if you were there? No.
New York Street Boys is not about imitating the eye. It’s about using a tool, in this case, a cut to enhance the viewing of the story.
I want the viewer to see the story, hear the story, and I’m going to try and make them feel the story.
Quick cuts are my attempt to take the viewer as much into the story as I think I can.
In the series of cuts from [:12] to [:14], the tight shot has little going on in them.
In a few frames, you see the drumstick hitting the trash can. But other than that, I keep what’s going on in the quick edits simple.
In the first 14 seconds of the story, I have lots and lots of cuts. It would be an epic edit if I kept that pace up throughout this piece. I don’t do this for a few reasons.
I don’t want this style to get in the way of the story
I’m just trying to use it to enhance the story in places
It would have taken me a long, long time to edit.
So from [:14] to [:31] I’m only just trying to tell a story. I also introduce our first character in the story.
The next time I use quick edits is at [:32]. I’m using it as a transition device to introduce another character.
I do this quick edits transition again at [:52] to introduce the final character.
Looking back on this story, I realized I didn’t introduce the viewer to him like I did with Alex and Dean. I guess that’s the reality of natural sound stories. You don’t always have all the elements to tell the whole story. It is a true talent to tell a great natural sound story. I did a good job. I did not do a great job. You should always strive to tell a great story and have the editing secondary. Honestly, I flipped those guidelines for this edit. I put the editing first and the story second. I will happen to you many times in your career.
At [:58] I use quick edits again as a transition device. The story moves from them banging on trash cans to banging on their heads.
I have quick edits again at [1:09]. I use them for a transition to the crowd. I felt I needed a little crowd reaction here with cheering.
You’ve got to have a reaction to all those actions in a story
I go back to quick edits at [1:15] to transition to the final element of the story. The New York Street Boys using fire.
Again at [1:22] for the beginning of the fire portion of the show.
And then there’s my big finally at [1:32]. After doing all these quick edits in certain places, I wanted to create a big finale in the editing. Just like the New York Street Boys create an end for the viewers in the mall, I wanted a big finish for the viewers watching the story at home.
Our story closes with a series of reaction shots from the crowd.
This was one of the most fun stories I’ve ever put together. It took me about 8 hours to edit. I edited this story tape to tape. There are 246 edits in the story. It runs [1:45]
Quick edits, when used in an appropriate story, can often enhance a story like this. Taking the viewer in more intimately than even someone watching just a few feet away. Frankly, it was a ton of fun to put this story together.
The art of editing comes down to frames of difference.
It’s 3 frames here or 4 frames there that can make each and every edit so much better or so much worse. This post is about some of those subtle editing tips.
Sentence Please is a story I edited in just a few hours. Under the opening shot, you hear the announcer. He’s telling a speller a word. I stagger the edits. I create a J-Cut and an L-Cut in the first two seconds of the story. These are also known as split-edits. For those of you not familiar;
A J-Cut is when you hear audio from a shot and then see the video. You make the letter J visually in the timeline.
An L-Cut is when you cut to a different video, but the audio from that previous shot remains.
In Sentence, Please hear the announcer say, “Speller, your word is Malaria.” The first shot of the story is a wide shot of the room with the announcer audio.
I make a cut (video only) and show the announcer. That is a J-Cut.
Then I make an L-Cut. You continue to hear the announcer, but the video is that of a speller.
In addition to using J and L cuts, I’m also employing eye trace.
I want to take the shot of the speller in pink [:01] right as she turns her head. The turn of her head helps acknowledge the announcer to her left (our right).
I am also trying to back-time the shot of her, so she speaks the word right after the announcer finishes speaking. In case you didn’t realize, I merged two different versions of the announcer to make this work. The photographer didn’t pan quickly from the announcer to the speller. The edits made it seem like two cameras were shooting the spelling bee. Create the illusion of a two-camera shoot in your edits.
You’ll see plenty of split-edits in this story. You’ll see plenty of split-edits every day in everything you watch. Split-edits are a part of the craft that you should notice all the time. No really! You need to start seeing split-edits everywhere. They are a vital component of editing. Take notice of them in your favorite movie, your favorite TV show, even your favorite commercial uses split-edits.
Let’s continue with the story and some more subtle editing tips.
The first reporter track in this story is “52 kids sat on the stage.”
For 52 kids, I show a lot of kids on stage. The next shot is that of a speller’s nervous hands.
I take the edit the second I see him fumbling with his hands [:05] nervously. The simple tight shot shows he is nervous. I also take the edit mid-fidget. Meaning the action of fidgeting has already started. Having as many edits with the action already started also makes edits look more natural. You should try to avoid making an edit before any action begins. Again this is another subtle tip. An important tip. Try taking your edits mid-action more. Your edits will look better, and your stories will flow better.
Very often the action within a shot can help convey a subtle message
I want to keep reinforcing the kid’s fidgety state throughout the story.
After a shot of another speller at the mic, the reporter track is “All with one goal in mind.”
The next shot is that of a speller looking down. I take the edit right when she moves her hand around.
Her motion helps convey everyone’s feelings while they are on stage. I also take the edit midmotion.
The difference between a good editor and a great editor is something that comes down to the frame you choose. In the edit, did I prefer something that helped convey the message of the story? Really start asking yourself, why is that shot in my story, and why did I take the edit the moment I did?
I cannot stress how vital editing midmotion helps your overall editing.
At [:17] I’m milking a shot. I like to maximize shots visually and auditorily. I use the shot, and the speller says meticulous twice. I place the reporter track within the two times the speller says meticulously. It’s a subtle way of getting more natural sound into a story. If you’re under a deadline, this is faster than trying to find another shot. You’ve got the shot on the timeline. See if you can milk it for all it’s worth. Just remember not to dry up the shot. Meaning doesn’t leave it up for any longer than you should. Vague, isn’t it. Every single shot in every unique story is different. There is no hard rule for this. It’s a feeling you get once you become a good editor.
At [:20], the reporter track is “The 7 to 14-year-olds each won their Boulder Valley or St. Vrain school’s contest to get here.”
I still want to show that uneasy feeling onstage. This shot of a 7-year-old perturbed was too good to pass up. His expression tells so much.
Don’t you just love this shot? I do. That’s why I’m writing about it. This shot has emotion in it. As I previously wrote, I always cut into emotion and never cut away from it. Do you think I cut away from this shot too early? I do. I should have left it up just a bit longer.
This shot is subtle. I wait to take the shot the second she scratches her face. Movement in every edit is what I strive for. Even if it’s something this subtle.
You’ll also notice a good amount of edits that are backtimed. Meaning I make a cut visually and back time the edit, so the natural sound moment I use plays right into a piece of narration or a soundbite.
Back timing edits are another tool to help blend and stagger audio and video edits.
Watch the story again. This time pay attention to what each kid is doing in each shot. Also, pay attention to how the action in the shot helps convey their feelings.
Little things like what’s going on in your shot, and when you take the edit can often make a good story just a bit better.
Every shot in this story has meaning
There are many split edits in this story
Subtle moments help make a story better
Thank you for continuing to read The Edit Foundry Blog.