What is video editing?

Forgive me if you know what video editing is. This post is to those just beginning their journey or those that need a refresher.

Some may argue that Horse in Motion (1878) was the first film. That film was accomplished using multiple cameras. These were still photographs assembled into a motion picture. They used 24 cameras to capture this.

Actual motion picture cameras weren’t developed until the 1880s. That is when the camera started capturing all the single images on one reel. At this time, there was no editing. Each film ran as long as there was a film to roll.

Filmmakers often would shoot and just stop the crank of the camera when they felt they completed capturing that scene. Then, they would reset for the next shot and start cranking again when the next scene was ready. You could say this was the beginning of editing. It was editing in the camera, so there still was no manipulation of the reel.

It wasn’t until the 1900s that editing really began.  Did you know that one of the very first reasons for editing is that studios wanted films to be longer? They wanted multiple film reels compiled into one continuous movie. After that revelation, they started putting images together to try and tell a story.

One of the very first films that not only combined reels but began to develop some rules (or guidelines as I prefer) for video editing is The Great Train Robbery (1903)

Watch this movie and realize

  • There is action/movement in every scene
  • They maintain screen direction (except for one edit)
  • There is sequencing
  • Each edit advances the story
  • There is an effort made in pacing/rhythm
  • Editing hasn’t changed much in over 100 years.

Intro to Video Editing in Premiere Pro

I’ve decided to take some time and create some tutorials in video editing.  Video Editing 101 is a 25-minute video tutorial.  The rundown of this video is below.

:28-Recording media on a memory card and not editing off your memory card
1:00-Never edit video off a memory stick
1:55-Folder hierarchy
3:25-Naming conventions
4:04-External Hard Drives
5:21-Setting up Scratch Disk
8:30-buried preview files
9:28-Workspaces
10:04-Import into the project
11:11-Importing pointer not actual files
11:44- (~) key expanding a panel full frame
12:16-Project panels list view and icon view
12:35-Scrubbing video in the icon view in project panel
13:01-Naming convention of raw clips
13:56-Putting clips in the source monitor
14:34-J, K, L keyboards shortcuts
15:16-Playhead
15:20-Timecode
16:12-Mark IN
16:41-Mark OUT
16:57-Dragging 1st edit to New Item Icon
17:38-Labeling sequence
19:44-Up and down arrow keyboard shortcuts
20:11-Adjusting Mark IN and Mark OUT in the source panel
20:52-Dragging edit to timeline or insert function
21:45-Patch panel
23:44-Match-action edit

After you watch the 101 video, you are ready to edit a VO/SOT in Premiere Pro. The rundown of this video is below.

:30 – Making sure scratch disk is set
1:00 – Changing autosave
1:54 – Going through labeling of clips in the Project panel
3:55 – S.W.A.P – Synchronize Words and Pictures
4:30 – Writing the script and editing the VO simultaneously
5:58 – Starting a new sequence with the new item icon
6:12 – Title your VO sequence
6:46 – Zooming in on the timeline
7:17 – Going through my process of reading script and editing VO
7:25 – Using match action to for a cut
8:06 – (.) key – keyboard command to insert video
10:15 – Using into the frame to decide an edit
11:56 – Using motion to select and IN point
12:05 – 10 seconds of pad on your VO
13:31 – Editing the SOT
13:50 – Using timecode to set IN point
14:23 – Drag SOT to new item icon to create a new sequence
15:07 – Modify a stereo pair to dual mono in your raw video
16:51 – Using solo to listen to one audio track
17:20 – Using the option key to eliminate one channel
17:45 – Auto Gain function for audio
18:33 – Pad at beginning of SOT using ripple tool
20:27 – Pad at end of SOT using ripple tool
21:00 – Export VO & SOT using H.264


What Video Editing Software Should Use Learn?

As an educator, people often ask me, “what non-linear editing software should I learn?” The quick answer is whichever one you can get access to the fastest and begin your journey. The long answer is you need to think about where you want to end up in your career. My career took me from Avid

Screen Shot 2020-03-30 at 1.48.20 PM

to Final Cut Pro,

Screen Shot 2020-03-30 at 1.49.37 PM

back to Avid, back to Final Cut Pro, and then to Premiere Pro.

Screen Shot 2020-03-30 at 1.50.20 PM

I use Premiere Pro exclusively now. If your drive is Hollywood, then Avid should be a priority.  A lot of production houses use Avid as well, so it’s a fantastic platform to have under your belt.

Adobe Premiere Pro is my current non-linear editor.  I love the platform, and I see it everywhere.  Movies, while not as many as Avid, are cut on Premiere Pro.  Various news stations edit on Premiere Pro.  I teach Premiere Pro.  I think this is the best program to begin your journey if your new to video editing.  The jump from Premiere Pro to Avid is an easy one as the overall ideas and execution of edits are somewhat similar on both systems.

I do think it’s essential to know at least two non-linear systems.  I would recommend Avid & Premiere Pro.


Using Soundbites and Narration to help make Edit Decisions that effect Rhythm and Pacing

When you make an edit, it’s an important decision.  Each edit should advance your story.  So when do you make an edit?  There are many reasons.  Your story should have a rhythm like a good song has a good beat.  How do you find your rhythm? Here’s an idea.  Follow the rhythm of the narration and the soundbites.

EG Trekking Careers – Lindsay Gore

This is a story I produced for Emily Griffith Technical College, profiling a successful graduate.  Throughout this story, I use the rhythm of my narration and the rhythm of Lindsay’s soundbites to help make edit decisions.

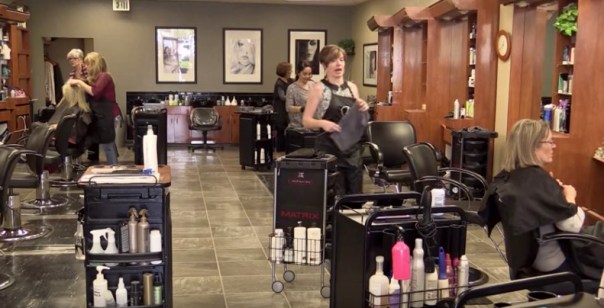
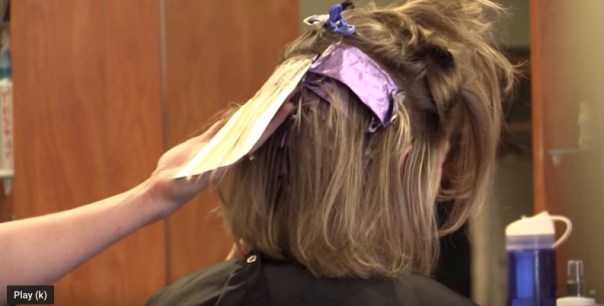
The 1st shot of the story is Lindsay walking to her salon station.

Screen Shot 2020-03-30 at 1.59.07 PM

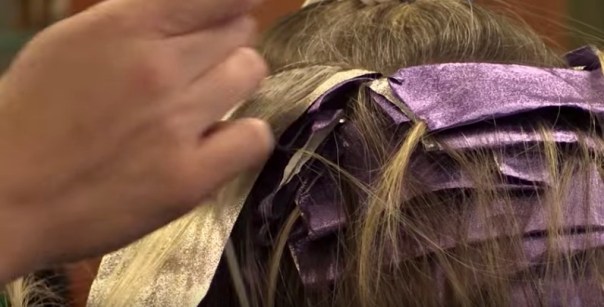
My narration is, “Lindsay Gore, preps for another client.” I make an edit on the word preps. The tight shot of hair stays up on the screen from 03 to 06.

Screen Shot 2020-03-30 at 1.59.45 PM

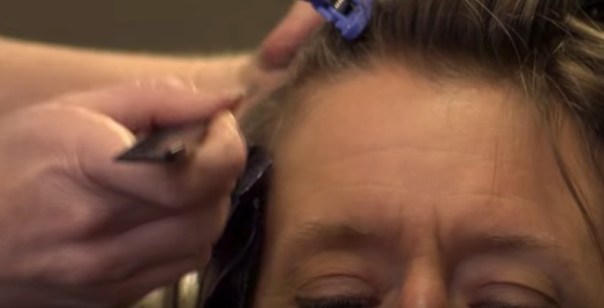
Lindsay says, “It’s pretty crazy in here. We do a lot of business.” After she says here, I make an edit. I’m finding natural pauses to help me make edit decisions.

Screen Shot 2020-03-30 at 2.00.22 PM

At: 09, my narrations is, “This full-service salon is Strandz hair studio.” My edit is on the word isIt is a natural moment of pause in the narration.

Screen Shot 2020-03-30 at 2.01.09 PM

At: 13, she says, “I do own Strandz.” Then she says, “I bought it two years ago. I worked here for almost 9 years before I bought it. In the back of my mind, I always knew I would like owning my own salon, and I love it.” I make two edits based on the rhythm of her voice.

At: 19, she completes her thought I bought it.

Screen Shot 2020-03-30 at 2.02.23 PM

At: 21, she completes the thought; my own salon. I make an edit after salon, but before she starts her next thought, which is I love it.

My next narration at 22 is, “It takes a lot to run a business.”

I make an edit between a lot and run.  I’m following the flow of my narration to help me decide when to make an edit.

Screen Shot 2020-03-30 at 2.03.05 PM

At: 28, her soundbite is, “After I started at Emily Griffith, I had a cousin in Cosmetology school at another place.”  I choose to make the edit after the word cousin.  I felt a natural pause in the rhythm of her voice at that moment.  I made the edit based on that.

Further, into that soundbite at 33, she completes a thought, “At another place.” After place, I make an edit.

Screen Shot 2020-03-30 at 2.03.54 PM

Please watch the entire story and pay attention to when I make the decision and how the rhythm of narration and soundbites can help with edit decisions.

Want another example?

Here is a story by the 2016 NPPA Photographer of the year Rob Collett.

Screen Shot 2020-03-30 at 2.21.35 PM

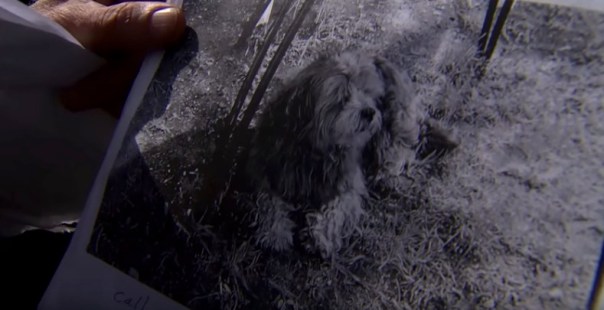
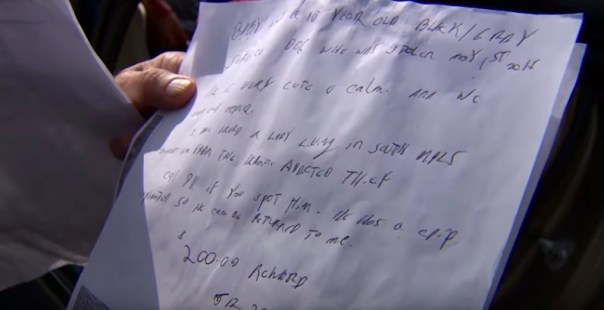
“Where’s Baby?”


The 1st soundbite of the story, “Baby. Black grey. 17 pounds. Rob makes an edit after the word grey and before he says 17.

Screen Shot 2020-03-30 at 2.08.26 PM

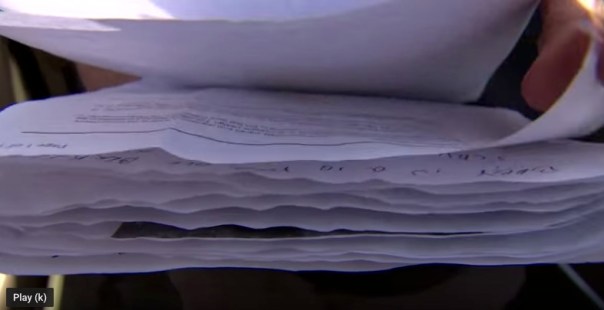
Then the narration begins.  “Missing poster after missing poster.”  Rob makes an edit after poster in the narration.

Screen Shot 2020-03-30 at 2.09.17 PM

Rob’s using the rhythm of the narration to help in his edit decisions.

At: 10, the narration is, “Each, handwritten and personalized.”  The edit is after each and beforehand.

Screen Shot 2020-03-30 at 2.10.03 PM

At: 18, the soundbite is, “Oh, I love his face, he’s a kisser boy.  Rob makes an edit after the word face and before the word he.

Screen Shot 2020-03-30 at 2.11.27 PM

Please continue watching the story by Rob.  Pay attention to the exact moment when he makes an edit.  There is a definite rhythm to the story.

These little things can take your editing to the next level.

Editing as Punctuation revisited

I recently came across this interesting video essay, Editing as Punctuation:  How ‘Punctuation Marks’ in Film Have Innovated Storytelling.

Editing as Punctuation in Film

It is a worthy watch for anyone editing film or video.

I have applied the logic of punctuation a bit differently in blog posts right here on the Edit Foundry.

In this post, It Went Viral!  But did the editing help?  I explain how I use completions of thoughts to help make edit decisions.

In this post, The Logic of Natural Sound in a News Package, I go into how natural sound in stories can be used as punctuation.

When you make your cut and move on to the next shot, there are so many reasons to consider.  Ask yourself these questions as you make decisions.

  1.  Did someone complete a thought? If you apply thought completions to your edit decisions, you will be amazed at how it changes your editing.
  2. Am I continuing a rhythm (pacing) with this edit-decision? Often turning off the sound and tapping a pencil on your desk every time you see an edit will help you discover pacing problems.
  3. Am I disrupting the rhythm of the story with this cut, and is there a reason to do that? This is fun!  Make a cut (or don’t) at a moment that creates a feeling that you want to convey to the audience like surprise, sadness, anger.  Make your audience feel something because of your edit.
  4. Am I cutting because the value of the shot is over? Sometimes it’s really this simple.  Don’t be afraid to make a cut simply because the value of the shot is complete.
  5. Am I cutting for match-action? I sometimes will make a decision about an edit for a match-action reason, and that will override other logic.
  6. Does this cut, at the moment I choose to advance my story? This should override everything, really.  Did it advance the story?  If it doesn’t improve the story, then it should be for another reason, like rhythm.
  7. What if I don’t make a cut at this moment? Sometimes the best edit is one you don’t make.

Lastly, how about you DON’T make an edit.  What does this do to your story if you simply don’t make an edit at this point?  Does this decision NOT to make a cut make your story better?

Thank you for reading.

Shawn Montano


It takes time to figure out how to use Music in Video Editing

I love using music too much. I misuse it, sometimes use the wrong type of music.  I force music into an edit just because.

You should be doing this too. You read that right.  Force it, use the wrong music, use it badly.

Use music as much as you can.  It takes time to figure out how to really make music work for a story.  Pay attention to how you hear it in film, commercials, documentaries, and television shows. When an edit adds music, it can change so much about the feeling of a story.

Practice, mess up, practice, get it right, practice, change your mind about what you got right and what you messed up, and then practice some more.  You’ll get it, but it’s going to take time.  Crafting a good edit is one thing, adding music and making it work for the edit is a whole other set of skills.

The story for this post is Journey of Hope Pt. 4

I won an Emmy for this documentary.  The journey of Hope is the story of a man with Parkinson’s disease.  Scott Orr decides to undergo life-changing brain surgery to help control the tremors associated with Parkinson’s.  I’m just going to use part 4 for this post.

When I edited this documentary, I worked where real music is allowed.   I used the soundtrack to Erin Brockovich.  This is the only soundtrack I used for the entire documentary.  By using the same music from the same source and the same composer, the whole documentary felt connected.

Don’t have the ability to use real music?  Search HARD through your library to find music that works.  I edited another documentary for the Discovery Channel called After Obesity, The Final Cut

I found a disc with music from one composer that had an extremely similar feel to the Erin Brockovich soundtrack.  I created a feel for this documentary as well as using one composer.

If you can use popular music, I recommend using something that’s not too mainstream or current.  I’ll use popular music that you don’t recognize immediately.  The reason I do this is music usually attaches itself to people on some emotional level.  I don’t want people to come into one of my stories with a pre-convinced emotion.  I want them to gain their own emotional attachment to my story.

  • Music can help the pace of a story
  • Music can add an emotional draw
  • Music can help reveal a moment in a story
  • Music can help with transitions between story elements

The journey of Hope Part 4  begins with music up full.  It’s rather serious in tone.  My music selection is helping set the tone in this section of the story.

This section of the documentary begins on a medium shot of the operating room.

The next shot is that of Dr. McVicker [:04] looking down seriously.

At [:07] the narration begins, We all know in life there are risks.  That’s followed by a soundbite by Dr. Kumar asking Scott a question.  The combination of music and selected soundbites gives the viewer a sense of something wrong during the surgery.  So at this point, the music is the establish-er of the mood, and the soundbites and narration are secondary.  I keep the music volume low so you can hear the narration and soundbites.  How low you ask?  Each story you edit will be different.  There is no magical number that will work.  You really have to understand the logic of audio.  

Let’s continue with the post.  

The music stays low until [:24]. The narration is When something appeared terribly wrong.

It’s at this point when you see Scott open his eyes and look to his right.

The music comes up full, and I let the shot breathe, allowing the viewers to understand the gravity of the moment.  It’s just a small moment.  It’s a reinforcement moment.  A moment to grasp the possible seriousness of everything that’s come so far.

Now listen closely.  From [:34] to [:38], the music fade down.  It’s very subtle and takes a full 4 seconds to fade away. The moment has passed. The minor scare is no longer an issue.  I want the music to fade away, but I don’t want the viewer to notice it fading away.  I want them to just focus on the story.

At [1:20], I cut out of the operating room and into the waiting room.

A few emotional moments are about to happen.  Earlier I used the music to set the tone.  Now I’m going to do the opposite.  The soundbites and emotion in the frameset the tone.  The music just supports it.  Everyone is happy, the surgery went well. These are positive soundbites. I call this a feeling of relief.  Everyone’s relieved the surgery went well.  The music helps convey everyone’s sense of relief.

At [1:24], the music starts midway through Scott’s fathers’ soundbite.  I’m using the soundbite to help bury the start of the music.  You don’t really realize the music is there right away.  The less the viewer notices the better editor you are.

I carry the ‘relief’ music underneath this whole section of Scott’s parents, his wife, and his best friend in the waiting room.

At [1:44], I bring the music up full.

There is a shot of Scott lying there calm. I’ll bet he’s relieved the surgery went well too.  I’m conveying that feeling.

At [1:43], I bring the music up full to [1:45]. There are two shots.  One of Scott’s head and one of his hand.  His hand isn’t moving.  That shot is the reason for the entire surgery.  The tremors have stopped. Very poignant moment, don’t you think?  Guess what?  Music full and a moment for the viewer to take it in.

If you are not familiar with Parkinson’s Disease, go here for a good explanation.

At [1:57] to [1:59], the music ends with a small moment.  That part of the story ends as well. Coincidence?  No.  I back timed the music to end right there.

  • I use music to help tell the viewer to understand that this is the end of this part of the story.

I’ve used two different pieces of music now. I’m not using it constantly.  I’m only trying to use it when I want to help reinforce the emotion of the moment.  The most important aspect of using music, maybe when you don’t use it.  I don’t use music again until [2:53]

At [2:52], Scott’s about to test the Pacemaker for the Brain he’s had implanted to help control the trembling in his hand.

  • This is the reason for the surgery.
  • It’s a critical moment in the story.

Well, based on those two bullets points and everything I’ve done so far with the story, It says time for some more music.  I chose something light and not overpowering.  I start the music up first and then the scene’s narration.

At [3:07] is the first time Scott sees his hand not tremble after the activation of the Pacemaker for the Brain.

I let the shot breathe with the music up.  Again, I’m allowing the viewer to take at the moment for just a little bit longer.

At [3:18], I let the music come up again.  Scott says, “Wow, haven’t seen that in a long time.”

Another moment I want to just let breath for an extra second.

  • Each time a moment or something poignant is said or seen, music comes up full in this section of the documentary.

At [3:25], Scott twitches his fingers as he’s looking down.  I let that moment breathe as well.  It’s also the end of that piece of music.  Again, I’m telling the viewer that’s the end of this part of the story.    Again I back-time the music, so the score ends right as this section of the story ends.

At [3:50], I start the music up again.  You have to listen very carefully.  I bring it up subtly.  As you can hear, I like to bring up music subtly.

  • I don’t like music all of a sudden there.

At [4:09], I bring the music up full again. The narration is, There is no cure for Parkinson’s, or it’s symptoms.

It’s not a moment, but it’s a poignant statement.  I decide to bring up the music because it is touching.

At [4:26], I change the music.  They are about to take the go-kart on the track  I wanted something upbeat and fun but something that still fit with the rest of the music.  I use this piece of music for the rest of the story.

At [4:54], the music ends as our story ends.  Again, I back timed the music to make this happen.

I hardly ever use the music as it was initially constructed. I’ll use bit and pieces and rework the music to fit my story.  I strive hard to make cuts the viewer won’t notice.

So, I may use the beginning of a piece of music, cut to the middle part I like to bring up full, then make another cut to help with my back timing to the end.

Thanks for continuing to read The Edit Foundry.  Don’t forget to like The Edit Foundry on Facebook and follow me on Twitter @shawnmontano


Adding frames of silence in video editing adds more than just silence

Adding frames of silence in video editing adds more than just silence – say what?  By adding a few frames of silence, you can enhance a story.

Ever edit a story with little video?  That’s a rhetorical question, by the way.  This happens every day to an editor somewhere.  This story has very little video.  Video is not essential, especially if you have emotion.  Anytime I get a chance to edit a story that has emotion, I’m all over it.  What do I do to help the story?  What emotion can I help display with editing?  How will my edit decisions impact the story?  Are there edits I’m not going to make that are important?  Let’s see if I can answer some of those questions.

The story for this post is Karen

It’s my job as an editor is to make you laugh, or to make you cry.  Sometimes the material we are given makes that a little easier than other times.

This story is about a woman who is almost a victim of a serial rape suspect.  In the interview, she is very emotional.  My job as an editor is to make sure her emotional state comes through in the story.

My job is to also stay out of the way.  What do I mean by that?  Sometimes an editor needs to not make an edit.

  • Those non-edits may be the most important edits you ever make.

At [:06], Karen sniffles, and the story pauses slightly.  I am introducing her emotional state.  I’m grabbing the viewer as quickly as possible.  There is a full 2 seconds of silence after the first narration before she sniffles.  Let your viewers in.  Give them time to feel.  So many stories I see the emotion goes by so fast the viewer doesn’t have time to feel it.

  • The #1 rule of editing is emotion.  Always cut into it and never cut away from it.

The pace is slow.  I’m going to maintain that pace as best I can.  Here are a few tricks.

  • There are at least 10 frames of silence between the narration and any soundbite.

Watch the story again.  Just listen to it this time.  If you listen carefully, you can hear all the pauses in between narration and soundbites.  This is a subtle trick.  It also a handy skill.  The beauty of it is it won’t cost you but a few more seconds.  If you’re in a world that requires short running times, this is huge.

At [:11] is her first soundbite. “I just kept thinking if Shawn hadn’t of come home with me, I just know what would have been happening.” After that soundbite, she looks at Shawn (her boyfriend, not me) and then turns her head and takes a deep breath. 

Upon revisiting this story, I think I left this moment just a bit too soon.  I think I could have held this for at least 15 more frames. Would 15 more frames have made any difference in the overall story?  No, but it’s essential to understand how just changing a few frames in an edit can create such a different edit in the end.

After the soundbite is a slow 80 Frame dissolve to a car going by and I put a slow zoom in on the shot.

  • Another simple editing trick for emotion, put a slow zoom on static shots to help pull the viewer into the story.

There wasn’t much video to work with on this story.  The only way to have more videos would have been to shoot a re-enactment.  This is not the type a story you would ever ask anyone to re-enact.  I use generic video at several points.  Do I care? Nope.  The story’s got emotion.  Viewers won’t remember these shots the next day.  They will remember Karen crying, though.

Karen didn’t want her house identifiable in the story.   I used these tight shots that could be from any home in any neighborhood.  Notice I put a slow zoom on each of these shots.  I hate static shots.

I am a fan of movement.  This is a visual medium of motion.  I like to have as much motion in every story as possible.

At [:45]  her soundbite is  “It was the first thing that popped into my mind, that it was him.”

There is a full second (30 frames) of silence before the narration starts.  I’m giving the viewer that extra time to feel and see her.

  • Sometimes nothing is more powerful than something.

At [2:16] is the final section of narration in this story.  9 seconds go by, and then she sniffles.  The story ends.  This is a powerful moment with no narration and no sound from her.  She is merely emotional on camera.  You can feel how fortunate she feels not to be a victim.  You can feel how terrified she still is.  Simply amazing, what 9 seconds of silence does for a story.

About the Dissolves

I dissolve mostly by feel.  Feel is impossible to teach.  Let me try and rationalize these dissolves with some logic.  In this story, most of the dissolves represent a transition in space. Dissolving from inside the house to outside.  Dissolving from a sketch to Karen. The 3 shots of the exterior starting at [:22] are cut together because they are all outside shots.

As for the dissolves from Karen full to Karen medium or Karen tight, I simply don’t like cutaways in this type of story.  Karen is the story. Her emotion is the story. Cutaways of her hands, of a lamp, or anything else won’t add to the story.

Thanks for reading.

You can follow me on Twitter @Shawnmontano

Please like The Edit Foundry on Facebook.

One of my top 5 video edits of my career

Have you edited a story that gets people talking?  Does it impact lives, win awards, or do people just watch it over and over to learn?  This entry is about that type of story.  If I were to rank edits I did over the past 20 years, this is in the top five.

This emotional story challenged me as a video editor.

Please watch Ryan Gave Chad the Gift of Life on my Youtube Channel.

The story begins with a slow zoom in on the Arnold family in the waiting room.

Adding a slow zoom in the editing process pulls the viewer into the story.  The next five shots are simply a series of shots showing the Arnold family in the waiting area.  As I was looking through the raw, I was simply looking for shot variety.  I start with a wide shot, then went to a medium shot, to another medium shot, and then to a tight shot.  The last three shots are all intimate.   I want to keep the viewer close with the family.

  • I’m not going to force an edit element if it doesn’t work

Notice at [:08] the music starts.  The music doesn’t swell until [:13].  I want to bring in music, but I want to make it subtle.  I like transition shots.  For this story, I didn’t like anything shot for transition elements.   I’m not going to force an editing element if it doesn’t work.  I chose to use music for a transition.

The music full at [:13] and the four shots in pre-op set up several story elements.  The music sets up the feeling of concern; at least that’s what I hope I’m doing with this particular piece of music.  I use two shots of Ryan and two shots of Chad. The music and shot selections tell the viewer a lot about the story.  No need for redundant narration.  This is an excellent example of just visuals and music working together to tell a part of the story.

This is an incredible story.  I don’t want any distractions. So, I did some color correction.  The video shot during pre-op was a bit on the yellow side, as you can see in this screen-grab.

Here is my color corrected version.

  • I like to use all the tools I have at my fingertips

I know the walls are yellow, but with a minimal effort, I significantly reduce the overall amount of yellow in the shot, I bring out the flesh tones of Ryan and his wife.  I like to use all the tools I have at my fingertips to make a great story.

After the four-shot montage, there are seven edits that all have dissolves. Do these shots cut together?  Yes, they do.

This is a creative and emotional call.  I think dissolves help reinforce emotion.  The final dissolve leads into the first soundbite from Chad.  You can still hear my music underneath this soundbite.

As the emotion of the soundbite increase, the level of the music decreases.  Listen when you watch the story again

I don’t want any distractions.  Chad has enough emotion in his voice.  The music isn’t necessary here.

At [1:41], I start the second piece of music.  Using the same technique as before, the music comes up underneath the story a few seconds before I bring the music up full.  I’m using music as my transition element again, this time to move into surgery.

The second soundbite at [1:56] follows the routine I did with the first soundbite.  The music decreases as the emotion in the soundbite increases.

At [2:09] is the part of the story where they are in surgery.  I have several shots to choose from.  I have many great shots of Ryan’s liver.  I decide not to be overly graphic with surgery video for one main reason, Chad dies.  This story contains some of the last videos of him alive.  His wife will watch this story.  His children may watch when they become older.  These are elements of editing you don’t necessarily think about in the edit bay, but I think you should.

At [2:53] is another selection of music.  I use music here differently.  I bring it up full immediately after the second doctor soundbite.  I’ve established throughout the story when music comes full, there is a change in the story.  This time it’s not a location change; it’s the final part of our story. The sad part of our story.  I have a series of pictures of Ryan with his family.  All the images have motion in them.  At [3:08], the reporter track tells the viewer Ryan dies.

I have the music up full for four seconds.  I’m allowing the viewer the take in what the reporter narrates.  Ryan dies.  The cliche is fade to black.  I don’t like editing cliches, especially in this piece. I want to do something simple while still visually telling of Ryan’s death.  A slow fade to black and white with this picture did the trick.  The next three images are still in black and white while the reporter talks about Ryan.  I think keeping the photos black and white is a smart look and helps with feeling here.  I do, however, return to color on the final picture of Ryan and his family.

After this section of the story, Chad talks about life without his brother Ryan.  He is very emotional.  I don’t need music, and I don’t put any music until the end of the story.  Chad stops talking and is trying to hold back his tears.  Lots of emotion but no sound here.  I decide to bring up the music to fill the sound-void.  It’s very subtle here.  I’m trying very hard not to have the music overpower his emotion.  I want to keep all editing distractions to a minimum.

This final image I leave the viewer with is one of the last photos of them together.  I took a freeze-frame of Ryan and Chad hugging before surgery.  I turn it black and white and have a slow zoom out.  I have a slow zoom in to begin the story and a slow zoom out to end the story.

Thank you for reading.  Follow the Edit Foundry on Facebook.


Using Midmotion in video editing to your advantage

After Sex Offender is a story on my 2011 NPPA Editor of the Year entry.

This general news story I edited in just over an hour. The photographer was invited to follow the Adam Walsh Task Force rounding up sex offenders. Marking an In on your clip midmotion practically helps every edit you will ever make.

Our story starts with a medium shot of a Marshall knocking on a door.

The 2nd shot [:03] of the story is this a shot of a resident and the Marshall opening the screen door.  Notice,  I wait until the Marshall has already started opening the door.  You are going to see edits taken midmotion A LOT throughout this story.  I’m a big fan of midmotion

Starting an edit midmotion does several things.  When you edit midmotion, the feeling the viewer gets is they are watching something un-staged.  If we start the edit and then he opens the door, the act feels more staged.  Like someone saying action and then it happening.

You want edits to hide as much of any staging a possible (None of this story was staged, and I never want the viewer to even remotely think that).  Speaking of staging, watch reality TV for an excellent example of this.  Most of you reading this already understand nearly all of reality TV isn’t all that real.  How else could the camera be in the right places unless they knew what was going to happen?  It’s the editing that makes reality TV seem so, well real.  Editing midmotion, starting the edit after an action has begun, hides (which is what editing is supposed to do) a lot.

The third shot [:05] we’ve moved inside a residence.  I use a J cut to help with the transition inside.  The sound of the Marshall before the video of the marshall inside blends the edits together better.

The 4th shot [:08] is also inside.  I don’t let movement stop in the previous shot (they are walking in, and the photographer following them is moving).  I take the edit on this 4th shot just before the photographer walks into this bedroom.  I use the movement of the photographer to help with my edit.

Notice a theme here.

There is movement/motion at the beginning of each shot.  Something I also pay attention to is eye trace and eye movement.  Notice the last frame of shot 3 and the first frame of shot 4 (previous two stills), the Marshalls are in the center of the frame.  I’m placing the viewer’s eye exactly where I want it; in this case, in the center of the frame.

  • There is movement/motion at the beginning of each shot

Here is the last frame of shot 4.

Here is the first frame [:12] of the next shot I chose.

Both gentlemen are in the frame at the exact same spot.  That’s no accident.  When I get an opportunity to place the viewer’s eye exactly where I want them to be, I do it in an edit.

Again in this shot, I’m taking the edit midmotion.

This is a, I think it’s cool edit. I take the edit midmotion just like I have done before.  I chose to start the edit on this frame, not because of eye movement but because the Marshall looks ‘cool.’  Coming out of the vehicle, he’s got this driving look on his face.  He looks around while putting a piece of paper in his pocket.  I think he just looks cool.

The next shot [:17] taken midmotion, and I utilize a J-cut here.  Why?  If we were following, we wouldn’t constantly be looking at him. Once we heard him say something, we would turn our heads and look at him.  The J-cut imitates that (imitate the eye).

The next 7 edits are all taken midmotion.  I don’t do that on this shot [:44], however.

Why?  Well, he has a caught criminal.  He is just sitting there.  The action of him sitting in handcuffs would draw your eye alone.

Another J-cut [:46] here.  Why?  Well, you would be looking at the arrested individuals, wouldn’t you?  You would hear the Marshall speak and then turn to look at him.  That’s why a J-cut is here.

For this edit [:50], notice I time the edit so that he puts the head down just as the Marshall is saying they admitted to being here illegally.

In the next 4 shots, there is not much going on, so my emphasis on movement isn’t as important.  The Marshall is also doing some interviewing, so I let those shots play out.

In the final six shots, there isn’t an emphasis on movement as well.  The Marshalls have wrapped up today’s work.  I’m merely looking for a shot to help convey that as much as possible.  I’m also looking for shots that look ‘cool.’  I particularly like this one.

I like the rack focus [1:05] from the back of the vest to the Marshall.
It really is the simple things that make you a better editor.

This blog’s primary focus is on the editing of stories.  I would like to point out a few things about the videography.

1.  The photographer stayed with either a medium or wide shot whenever an opportunity to catch an apprehension on camera.  An excellent idea.

2. Only when the environment was under control, like after an apprehension did the photographer shoot tight shots or try to get sequences.

Thanks for reading.

What exactly do you put in a sequence in video editing

This entry is about sequencing. You already know about sequencing? Please, bear with me. You might learn something even if you didn’t understand about sequencing.

Screen Shot 2020-04-01 at 5.20.43 PM

What’s a sequence?

  • A series of shots that should get an object or a person from point a to point b

  • All shots in the sequence should have a commonality to them either by time, location, or elements in the shot

  • Should have a beginning, a middle and an end (more complicated than you think)

All stories are one master sequence

Why do you think that icon you double click to load in the timeline is called a sequence?

Screen Shot 2020-04-01 at 5.21.30 PM

Within that master sequence, you should have many, many, many (get the idea) many smaller sequences. It doesn’t matter if it’s a film, a news package, a personal profile on a web page, or a slide show full of photographs, all stories should use sequencing.

Screen Shot 2020-04-01 at 5.23.57 PM

Every day in your life, you experience sequencing.

In fact, when you open your eyes for the first time, you are about to start the opening sequence of your day. My first sequence usually consists of me opening my eyes, looking at the time, and then turning my head to see my lovely wife next to me. That is a three-shot sequence with a beginning, a middle, and an end. My morning continues with a sequence of me getting out of bed. A sequence of me going downstairs to make coffee.

Many more sequences make up my morning, how about you?

Imitate life.

Imitate the eye

Life is full of sequences

Your eyes observe those sequences. Put those sequences into your projects.

There much more to sequencing.  So let’s use a story I edited to help understand more about sequencing.  The story we’ll use for this post is On This Rock.


This is a story I edited for the ‘Extreme Kellie’ series I produced while I was at KWGN/KDVR in Denver.  In this story, Kellie decides to give rock climbing a try.

The first sequence in the story is Kellie putting on her rock climbing shoes.

Screen Shot 2020-04-01 at 5.26.51 PMI start with a tight shot of her putting on her shoe on her right foot.

Screen Shot 2020-04-01 at 5.27.29 PM

The next shot is a medium shot of Kellie fiddling with her shoe on her left foot.

Screen Shot 2020-04-01 at 5.28.06 PM

The 3rd shot in my sequence is Kellie showing the bottom of her shoe.

This sequence was only 3 shots, yet it had a beginning, a middle, and an end.

  • All 3 shots are related by time, the time Kellie uses to put on her shoes.

  • All 3 shots are related by location, Kellie sitting on the rock.

  • All 3 shots are related by commonality; Kellie, Rock, Shoes.

All these shots are in order of events.  We don’t see every event. We don’t see her tying her shoes.  We don’t see her putting on her shoe on her left foot.  Our minds fill in those blanks for us because this is a ubiquitous sequence we observe every day in the world.

Compelling storytelling and effective sequencing don’t have to show everything.  It should reveal just enough, so the viewer understands what going on in the sequence.  It should also advance the story.

The next four shots are Kellie talking about how high the rock is and me showing a couple of cutaways of the rock.

Is this a sequence?  Does is get an object or person from point a to point b?  Not really. Are the shots connected by location? Yes. Are the shot connected by time?  Yes (although they could have been shot on two completely different days and the viewer would never know; the beauty of editing). Do they share a commonality? Yes.

You see, Kellie and the rock in one shot and in the other shot just the rock.  Yes, this is a sequence with a beginning a middle but not really an end.

I call this a transitional sequence.

Because I’m going to move Kellie from one spot on the rock to another using the rock cutaway as my transitional shot. Think about if you were there watching all this happen. You look at Kellie. Then, you look up at the rock to see how high it is. While you are looking up, Kellie stands up and walks to a new position. You look down, and she is now standing in a different spot. You didn’t see Kellie get up an move. Your minds accept this because you were looking at something else during that time. The cut that might have happened in your head.  I’ve imitated it in my timeline.

The next sequence is Kellie putting on gear.

Screen Shot 2020-04-01 at 5.32.44 PMScreen Shot 2020-04-01 at 5.32.52 PMScreen Shot 2020-04-01 at 5.32.59 PM

We have a medium shot with a new background.  So, I’m establishing a new location with this shot. The next shot in the sequence is Kellie stepping into the harness. Followed by a tight shot of her tightening up the harness. Followed by Kellie looking down, commenting on making it tight.

Screen Shot 2020-04-01 at 5.34.50 PM

The beginning, middle, end.  I’ll bet you’re saying, “how is that an end?”  “We don’t see the harness complete on her body.”  In the next shot, you do.

The next two shots are Kellie putting on her helmet.  Just a two-shot sequence here.

These two shots are tied to the previous sequence and to the following sequence.  Getting getting ready to climb the rock is one sequence with a beginning, middle, and end.  The getting ready sequence is made of five sub-sequences.

  • Putting on shoes

  • Moving Kellie to another position

  • Putting on harness

  • Putting on helmet

  • Attaching Kellie to safety rig

Every story you edit, you should be able to break down into sub-sequences.  Within those sub-sequences, you should be able to further break down into sub-sequences. Sequencing should be everywhere in your story.

Next, we have a transitional sequence.

This is a sequence of Kellie getting ready to start climbing the rock.

Within all this sequencing is the actual selection of shots you make as an editor.

In this section of the story, Kellie is actually climbing the rock.  I’m going to sequence Kellie getting to the top of the rock.  The photographer did a great job getting lots of shots to choose from.  I’m going to explain why I chose the shots I did in the sequence.

I start with a tight shot of Kellie’s hand.

Screen Shot 2020-04-01 at 5.40.44 PM

Then a medium shot of her starting the climb.

Screen Shot 2020-04-01 at 5.42.13 PM

Followed by a shot from below her looking up.

Screen Shot 2020-04-01 at 5.42.59 PM

Followed by a medium shot from above looking down on Kellie.

Screen Shot 2020-04-01 at 5.43.49 PM

Followed by a shot from the above wide.

Screen Shot 2020-04-01 at 5.44.19 PM

I decided to start with tight shots, move to a medium shot, and then to a wide shot.  I’m doing three things here within the sequence.

  • I give the viewer intimacy with Kellie

  • I provide the viewer with familiarity with the rock

  • I give the viewer a spatial relation on where Kellie is on the rock

Spatial relations is something that’s often overlooked in all editing overall.  Spatial relations is how editors help convey to the viewer where objects are relative to space.  I started the sequence of Kellie beginning to climb the rock with two tight shots.

But Kellie could be anywhere on the rock in those two shots.  In the next shots, you actually see the ground below here but don’t really know how far she has to go.  In the 4th shot, I’m giving the viewer a proper perspective that she’s at the bottom of the rock and has a way to go.  Now the viewer has a perspective.  Your job as the editor is the take the viewer to the scene as best you can.  Give them an idea of everything you can about what going on in the sequence.

I continue to give the viewer a perspective on where Kellie is on the rock, and I’m still sequencing.


Notice in the rest of the story, I’m always moving from shots from above her to shots below her, all in sequence.  All about helping the viewer with perspective.

So what do you put in the sequence?

  • A beginning, a middle, and an end

  • Tight shots for intimacy

  • Wide shots to help with spatial relation

  • Variety (from above, from below, from the side) – help the viewer get an idea of what is going on and where

  • Shots that advance your story

Remember, only you can help prevent bad editing

Thanks for reading.