Forgive me if you don’t know what video editing is. This post is for those just beginning the journey or needing a refresher.
Debates may arise over the first film, with some pointing to the groundbreaking Horse in Motion (1878). This cinematic marvel was crafted using multiple cameras, a collection of still photographs ingeniously assembled into a motion picture. A staggering 24 cameras were employed to capture this pioneering piece of film history.
Actual motion picture cameras were developed in the 1880s. That is when the camera started capturing all the single images on one reel. At this time, there was no editing. Each film ran as long as there was a film to roll.
Early filmmakers would shoot scenes, halting the camera’s crank when they deemed the shot complete. They would then reset for the next scene, resuming the crank when all was ready. This marked the nascent stage of editing, a form of editing within the camera that did not involve manipulation of the reel.
Editing began in the 1900s. Did you know that one of the first reasons for editing is that studios want films to be longer? They wanted multiple film reels compiled into one continuous movie. After that revelation, they started putting images together to try and tell a story.
One of the very first films that not only combined reels but began to develop some rules (or guidelines, as I prefer) for video editing is The Great Train Robbery (1903)
Watch this movie and realize
There is action/movement in every scene
They maintain screen direction (except for one edit)
There is sequencing
Each edit advances the story
There is an effort made in pacing/rhythm
Editing has mostly stayed the same for over 100 years.
During the height of the pandemic, I decided to create videos using editing tutorials. Even though Premiere Pro has changed significantly since 2020, this video still relates to anyone beginning their video editing journey in Premier Pro.
Video Editing 101 is a 25-minute video tutorial. The rundown of this video is below.
:28-Recording media on a memory card and not editing off your memory card
1:00-Never edit video off a memory stick
1:55-Folder hierarchy
3:25-Naming conventions
4:04-External Hard Drives
5:21-Setting up Scratch Disk
8:30-buried preview files
9:28-Workspaces
10:04-Import into the project
11:11-Importing pointer not actual files
11:44- (~) key expanding a panel full frame
12:16-Project panels list view and icon view
12:35-Scrubbing video in the icon view in project panel
13:01-Naming convention of raw clips
13:56-Putting clips in the source monitor
14:34-J, K, L keyboards shortcuts
15:16-Playhead
15:20-Timecode
16:12-Mark IN
16:41-Mark OUT
16:57-Dragging 1st edit to New Item Icon
17:38-Labeling sequence
19:44-Up and down arrow keyboard shortcuts
20:11-Adjusting Mark IN and Mark OUT in the source panel
20:52-Dragging edit to timeline or insert function
21:45-Patch panel
23:44-Match-action edit
After you watch the 101 video, you are ready to edit a VO/SOT in Premiere Pro. The rundown of this video is below.
:30 – Making sure scratch disk is set
1:00 – Changing autosave
1:54 – Going through labeling of clips in the Project panel
3:55 – S.W.A.P – Synchronize Words and Pictures
4:30 – Writing the script and editing the VO simultaneously
5:58 – Starting a new sequence with the new item icon
6:12 – Title your VO sequence
6:46 – Zooming in on the timeline
7:17 – Going through my process of reading script and editing VO
7:25 – Using match action to for a cut
8:06 – (.) key – keyboard command to insert video
10:15 – Using into the frame to decide an edit
11:56 – Using motion to select and IN point
12:05 – 10 seconds of pad on your VO
13:31 – Editing the SOT
13:50 – Using timecode to set IN point
14:23 – Drag SOT to new item icon to create a new sequence
15:07 – Modify a stereo pair to dual mono in your raw video
16:51 – Using solo to listen to one audio track
17:20 – Using the option key to eliminate one channel
Editing is an important decision. Each edit should advance your story. So when do you make an edit? There are many reasons. Your story should have a rhythm, like a good song and beat. How do you find your rhythm? Here’s an idea: Follow the rhythm of the narration and the soundbites.
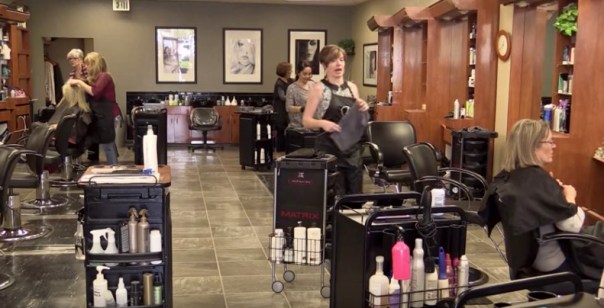
This is a story I produced for Emily Griffith Technical College, profiling a successful graduate. Throughout this story, I use the rhythm of my narration and Lindsay’s soundbites to help make edit decisions.
The 1st shot of the story is Lindsay walking to her salon station.
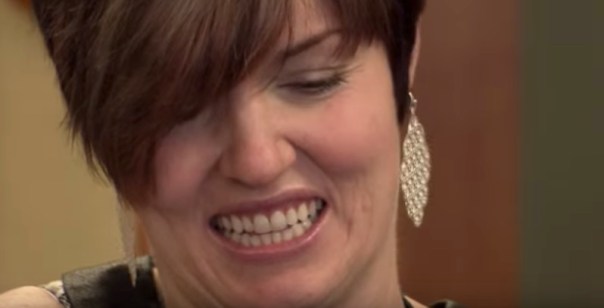
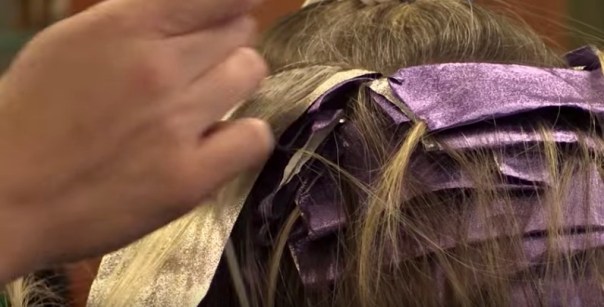
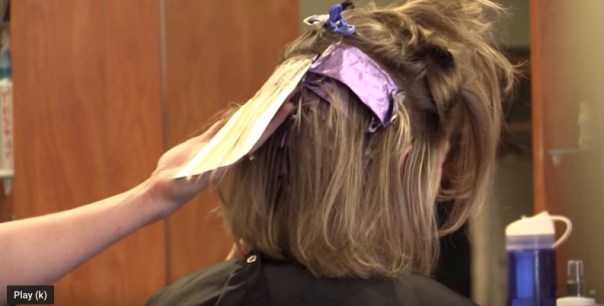
My narration is, “Lindsay Gore, preps for another client.” I make an edit on the word preps. The tight hair shot stays on the screen from :03 to :06.
Lindsay says, “It’s pretty crazy in here. We do a lot of business.” After she says here, I make an edit. I’m finding natural pauses to help me make edit decisions.
At: 09, my narrations is, “This full-service salon is Strandz hair studio.” My edit is on the word is. It is a natural moment of pause in the narration.
At: 13, she says, “I do own Strandz.” Then she says, “I bought it two years ago. I worked here for almost 9 years before I bought it. In the back of my mind, I always knew I would like owning my own salon, and I love it.” I make two edits based on the rhythm of her voice.
At: 19, she completes her thought, I bought it.
At: 21, she completes the thought; my own salon. I make an edit after salon, but before she starts her next thought, which is I love it.
My next narration at 22 is, “It takes a lot to run a business.”
I make an edit between a lot and run. I’m following the flow of my narration to help me decide when to make an edit.
At: 28, her soundbite is, “After I started at Emily Griffith, I had a cousin in Cosmetology school at another place.” I choose to make the edit after the word cousin. I felt a natural pause in the rhythm of her voice at that moment. I made the edit based on that.
Further, into that soundbite at :33, she completes a thought, “At another place.” After place, I make an edit.
Please watch the entire story and pay attention to when I make the decision and how the rhythm of narration and soundbites can help with edit decisions.
Want another example?
Here is a story by the 2016 NPPA Photographer of the year Rob Collett.
This entry is about sequencing. You already know about sequencing? Please, bear with me. You might learn something even if you didn’t understand about sequencing.
What’s a sequence?
A series of shots that should get an object or a person from point a to point b
All shots in the sequence should have a commonality to them either by time, location, or elements in the shot
Should have a beginning, a middle and an end (more complicated than you think)
All stories are one master sequence
Why do you think that icon you double click to load in the timeline is called a sequence?
Within that master sequence, you should have many, many, many (get the idea) many smaller sequences. It doesn’t matter if it’s a film, a news package, a personal profile on a web page, or a slide show full of photographs, all stories should use sequencing.
Every day in your life, you experience sequencing.
In fact, when you open your eyes for the first time, you are about to start the opening sequence of your day. My first sequence usually consists of me opening my eyes, looking at the time, and then turning my head to see my lovely wife next to me. That is a three-shot sequence with a beginning, a middle, and an end. My morning continues with a sequence of me getting out of bed. A sequence of me going downstairs to make coffee.
Many more sequences make up my morning, how about you?
Imitate life.
Imitate the eye
Life is full of sequences
Your eyes observe those sequences. Put those sequences into your projects.
There much more to sequencing. So let’s use a story I edited to help understand more about sequencing. The story we’ll use for this post is On This Rock.
This is a story I edited for the ‘Extreme Kellie’ series I produced while I was at KWGN/KDVR in Denver. In this story, Kellie decides to give rock climbing a try.
The first sequence in the story is Kellie putting on her rock climbing shoes.
I start with a tight shot of her putting on her shoe on her right foot.
The next shot is a medium shot of Kellie fiddling with her shoe on her left foot.
The 3rd shot in my sequence is Kellie showing the bottom of her shoe.
This sequence was only 3 shots, yet it had a beginning, a middle, and an end.
All 3 shots are related by time, the time Kellie uses to put on her shoes.
All 3 shots are related by location, Kellie sitting on the rock.
All 3 shots are related by commonality; Kellie, Rock, Shoes.
All these shots are in order of events. We don’t see every event. We don’t see her tying her shoes. We don’t see her putting on her shoe on her left foot. Our minds fill in those blanks for us because this is a ubiquitous sequence we observe every day in the world.
Compelling storytelling and effective sequencing don’t have to show everything. It should reveal just enough, so the viewer understands what going on in the sequence. It should also advance the story.
The next four shots are Kellie talking about how high the rock is and me showing a couple of cutaways of the rock.
Is this a sequence? Does is get an object or person from point a to point b? Not really. Are the shots connected by location? Yes. Are the shot connected by time? Yes (although they could have been shot on two completely different days and the viewer would never know; the beauty of editing). Do they share a commonality? Yes.
You see, Kellie and the rock in one shot and in the other shot just the rock. Yes, this is a sequence with a beginning a middle but not really an end.
I call this a transitional sequence.
Because I’m going to move Kellie from one spot on the rock to another using the rock cutaway as my transitional shot. Think about if you were there watching all this happen. You look at Kellie. Then, you look up at the rock to see how high it is. While you are looking up, Kellie stands up and walks to a new position. You look down, and she is now standing in a different spot. You didn’t see Kellie get up an move. Your minds accept this because you were looking at something else during that time. The cut that might have happened in your head. I’ve imitated it in my timeline.
The next sequence is Kellie putting on gear.
We have a medium shot with a new background. So, I’m establishing a new location with this shot. The next shot in the sequence is Kellie stepping into the harness. Followed by a tight shot of her tightening up the harness. Followed by Kellie looking down, commenting on making it tight.
The beginning, middle, end. I’ll bet you’re saying, “how is that an end?” “We don’t see the harness complete on her body.” In the next shot, you do.
The next two shots are Kellie putting on her helmet. Just a two-shot sequence here.
These two shots are tied to the previous sequence and to the following sequence. Getting getting ready to climb the rock is one sequence with a beginning, middle, and end. The getting ready sequence is made of five sub-sequences.
Putting on shoes
Moving Kellie to another position
Putting on harness
Putting on helmet
Attaching Kellie to safety rig
Every story you edit, you should be able to break down into sub-sequences. Within those sub-sequences, you should be able to further break down into sub-sequences. Sequencing should be everywhere in your story.
Next, we have a transitional sequence.
This is a sequence of Kellie getting ready to start climbing the rock.
Within all this sequencing is the actual selection of shots you make as an editor.
In this section of the story, Kellie is actually climbing the rock. I’m going to sequence Kellie getting to the top of the rock. The photographer did a great job getting lots of shots to choose from. I’m going to explain why I chose the shots I did in the sequence.
I start with a tight shot of Kellie’s hand.
Then a medium shot of her starting the climb.
Followed by a shot from below her looking up.
Followed by a medium shot from above looking down on Kellie.
Followed by a shot from the above wide.
I decided to start with tight shots, move to a medium shot, and then to a wide shot. I’m doing three things here within the sequence.
I give the viewer intimacy with Kellie
I provide the viewer with familiarity with the rock
I give the viewer a spatial relation on where Kellie is on the rock
Spatial relations is something that’s often overlooked in all editing overall. Spatial relations is how editors help convey to the viewer where objects are relative to space. I started the sequence of Kellie beginning to climb the rock with two tight shots.
But Kellie could be anywhere on the rock in those two shots. In the next shots, you actually see the ground below here but don’t really know how far she has to go. In the 4th shot, I’m giving the viewer a proper perspective that she’s at the bottom of the rock and has a way to go. Now the viewer has a perspective. Your job as the editor is the take the viewer to the scene as best you can. Give them an idea of everything you can about what going on in the sequence.
I continue to give the viewer a perspective on where Kellie is on the rock, and I’m still sequencing.
Notice in the rest of the story, I’m always moving from shots from above her to shots below her, all in sequence. All about helping the viewer with perspective.
So what do you put in the sequence?
A beginning, a middle, and an end
Tight shots for intimacy
Wide shots to help with spatial relation
Variety (from above, from below, from the side) – help the viewer get an idea of what is going on and where
You have to put images together in video editing to tell a story. You’re a storyteller. It doesn’t matter if you are editing a news package, a documentary, a film, or an online feature using stills, It’s all storytelling.
Putting the images together to try and tell a story is video editing. Every edit should be made for the story. Before sequencing, action/reaction, movement, eye trace, or continuity, there is the story (See guideline of six for more).
You learned about telling stories with pictures when you first started reading. When my sons were little, I would have them read to me. They were taught when they don’t know a word to look around at the pictures for clues.
As video editors, we need to help the audience with clues. We need to give them picture clues.
When the wild things “made him (max) king of all wild things,” Maurice Sendak shows a picture of this happening.
As storytellers, we can take a cue from when we first started to learn about stories. We read them and look at the pictures. The pictures help the stories make sense. Take this basic idea and apply it to video editing.
The following story I edited several years ago about a snowstorm here in Denver. It does not matter if you edited a story yesterday or 10 years ago, the images still have to make sense with the story.
Please watch More Than Just An Inconvenience.
The entire story, my goal (and usually my goal with every story) is to find pictures to help tell the story.
The very first line of track from the reporter is
This was the end of the line.
And my image is
In the next three shots, I’m just trying to match the pictures and the words.
Instead of an interstate highway
I-70
Was a dead end road.
After the reporter track is a soundbite
I’ve been doing this for 30 years, you get…you know this stuff happens driving a truck. And it’s going to happen sooner of later and more than once.
I cover the second half of his soundbite with a truck with snow on it.
The shot supports the story and helps tell the story.
The next piece of track is
But twice in a week
And I show this
Multiple trucks in the shot. The closest I can get to some kind of symbolism of twice. I still think this shot advances the story.
The story continues
Truckers pass the time
with bottomless cups of coffee,
and John Wayne on the TV.
I’m making every effort I can to show what the reporter is talking about.
Now some make think I am too literal with my editing of the story. In the case of a simple general news story, I want to help the viewer understand the story as best as I can with the images I’ve been given. As you develop your skills, this is a pretty easy way to make sure your stories are making sense to the viewer.
This documentary is the story of Scott Orr and his decision to have life-changing brain surgery. This surgery would help with the tremors associated with Parkinson’s Disease. This documentary was one of the most rewarding things I’ve ever done at a television station. It challenged me on so many aspects of editing and production. It pushed me as an editor to use every skill I had developed. Before I started editing, I got organized.
I didn’t capture a lot of the video for this. In fact, my photographer, Dave Wertheimer, captured a majority of the video for me. I still went threw every tape (Yes, this was back in the days when we shot on tape).
Logging is a critical process, especially in anything, especially in long-form.
I edited this is in Avid. Here are some things I did before starting editing. It doesn’t matter what NLE you use, these are all things you can do in any NLE.
Every time a shot changed, I put locators on the video. That way, I could toggle between EVERY SHOT. So as I watched every tape that was captured, I added locators. Most of the time, I watched the video at either two or three times speed. I didn’t have time to watch everything in real-time. Nowadays, we don’t have this problem because every time you hit record with a digital camera, you get a new clip. But if your recording a clip, moving around, and don’t pause recording, this is still a good idea and a time saver in the long run.
I sub-clipped A LOT. I sub-clipped interviews, the surgeries, at the race track, head shaving party, etc. So later, I could just go to the sub-clips and look at a smaller amount of media at once. I still sub-clip, exceptionally long interview.
I had a different bin for each tape the photographer shot. VERY important for organization and for sanity. This is still something I do to this day. I make many, many bins in long-form edits. I try to keep the number of clips in a bin small. In a documentary, I’m usually editing sections at a time. So, it makes bins correspond to these sections as best I can. I re-arrange bins all the time, moving clips around in bins to be better organized. The last documentary I edited I spent over 6 months on, so I knew to reorganize in the end was still a time saver.
I have additional bins for music, graphics, sequences, etc.
I made sure my media was as organized as I could possibly have it.
I also made sure my media was organized in folders on my scratch. I am very, very organized. I can’t tell you how much time this had saved, especially when I needed to find a clip or move media to different drives.
Here is an example of the folder structure I had on a recent project.
Within my master folder are sub-folders. Within my sub-folder are more sub-folders. See how I broke down folders by various cameras used. I have a folder for animations, graphics, music, and VOs.
Keep Organized!
Get organized. Over-organize. Practice getting organized.
I have noted all over the place. I have notes on paper, and I have digital notes. When I put locators on the video, I write notes on the locator all the time. It is an excellent practice to get into. If you don’t know how to put a locator on a clip on in the timeline, I sincerely suggest you invest some time learning how to do that.
Do whatever you can BEFORE the edit to be the most organized video editor you possibly can.