The Why of My Simple Motion Effects in Video Editing

A motion effect changes the size, shape, opacity, duration, the position of your video, image, text, or graphic in your projects.  Motion effects are easy.  I’m not going to explain the how of motion effects.  I’m going to explain why.

Our story for this post is We haven’t heard that word in forever.

The first shot [:00] is Garrett shooting a basketball around in an empty gym.

There is a slow zoom.  The photographer didn’t shoot that, I did that in post.  I want to pull you into the story visually and symbolically.  I change the scale from 100% at the start of the clip to 130%.  130% of the original resolution is about the maximum I scale video.  Beyond 130%, your video starts getting blurry.

The next shot [:07] is of the scoreboard.

I start the scale at 125% and create a slow zoom to 100% scale.  The speed is 75%.  The shot is blurry.  I like the way the light coming from the scoreboard blends with the silhouette shot of garret playing basketball.  The cross-dissolve between the two shots is 4 seconds.

The next shot [:11] is a super-tight shot of the scoreboard rotated -30 degrees.

At 130% scale and scaled it back to 100%.  I copy and paste the motion attributes from the previous motion effect to save time.

You should think backward when you’re creating a motion effect.  Think about what you want the effect to be at the end of the clip. Do you want to zoom in, zoom out, change the duration?  In each of these cases, I think about the last frame before I decide what to do with the first frame of the clip.

The next time I do a motion effect [:27] is between George Carl’s sound bites.

I change the speed of this clip.  The real reason, the shot doesn’t last as long as I want it, so I slow down the rate to 50%.

Ok, back to Garret playing basketball and back to me with a slow zoom [:55].  I’m just trying to pull you into the story.  I don’t want it to be always so obvious I’m doing this.

Scale from 100% to 115%.  It’s subtle.  The viewer barely notices it.

Another scaling from 100% to 120% [1:31]

Another subtle scaling from 100% to 120% on this interview [1:42]

I like zooming in on moments of emotion or revelation in soundbites.

This story is video light. I didn’t have much time to work on it either.  I use what I have and get creative when needed. The reporter talks about the doctor’s office, the video I don’t have.  So, I change the speed of this video to 33%.

I know where I want my shot to end, right when the camera is up close in his face.

I want the shot to start right as the camera stabilizes, and the photographer is just past his light stands in the shot.  Using fit to fill, it calculates 33% speed.

The next shot, same logic.

I know I want to end when the camera is in focus.  I know I want to start while the shot is still blurry.  I fit to fill for a 50% velocity.

Many times in editing, I think about where the shot ends more than where the shot starts.

These motion effects that are quick and easy.  Great to use when under a deadline, and you have a 4 minutes plus story to keep the viewer engaged in.

Thanks for reading The Edit Foundry.

Follow me on Facebook.

In The Style Of Jump Editing

You know how to edit.  You understand the basic concepts of video editing.  You know the importance of a sequence.  You’ve grasped screen direction.  You know the importance of tight shots.  You know the rules, which are more guidelines than rules.  So, you want to break some rules?

This is a style that you could use, no matter what type of storyteller you are.  I call this jump editing.

Jump cuts are intentional.  There are some rules to jump editing (or guidelines).

Are you ever given a story that just screams jump cuts?  I was given a few of these in my time in a newsroom.  The goal is to tell the story of a makeover while weaving a story of a woman that is ambushed.  I have fun with stories like these.  I do have a method to this madness I call jump editing.  I’m going to share my process.

I cut the story as tight as I can.  I fit as much story and visuals as I can in 1:45.  You see lots of edits, not too many, but enough to make the story fast and fun.

Our story for this post is She’s a Lady.

Our story begins with our host walking up to an unsuspecting woman.

In the second shot of the story [:02], I increase the scale to 130%.  I take the edit mid-motion.  Taking edits on motion helps disguise jump cuts a little, music videos do this all the time.

Why did I increase the scale?  So the next shot isn’t as brutal of a jump cut with this shot.  The change in scale creates two shots with a little bit of a difference in composition.

Her position in the frame helps as well.  Another idea I didn’t do.  Re-size the image and move it to adjust where the person is in the frame.

The next shot, the videographer pans from our makeover candidate to our show host.  The shot ends looking like this.

I break up the host talking about the ambush (she rambles on with information that doesn’t advance the story) when I make the next edit. It is this [from 08 to 10].

Again, I use the same trick as before.  I increase the scale of the shot. In this shot, I increase the scale to 120%.

It is enough of a compositional change that hides a jump cut (sort of). I make another edit breaking up our host talking.  I change the scale back to 100%.

You’ll see later in the piece jump cuts where our woman is in different spots in the store.  I’m ok with those kinds of jump cuts regardless of editing style.  When you are going from the interview or the one being interviewed and the composition is the exact same, I think a subtle change in composition really helps these edits not become too jarring.

When our subjects accept, the shot of her accepting is fast.  There are two pans back to back.  Another way I hid the jump cuts, I use the pan and make my cuts on the movement or right before the movement starts.  After the pans, we are introduced to an assistant in the makeover.

Then I edit a shot of everyone entering the first store. The camera is still panning when I take the edit, and everyone entering the store is moving [:09].  There is a lot of change in the composition as well, two things that ease the jump cut.

They are in the store, and then I go back to the interview in the middle of the mall.  Why?  I always like to show emotion on camera.  Emotion overrides all in editing, right?  That’s why I go back outside of the store because our candidate is excited about her makeover.

A music montage follows.  I’m using Tom Jones’ She a Lady for this story.  I love me some Tom Jones.  The song also fits the story very well. In the montage notice again a lot of movement.

The edit at [:15] I take just when she pulls her head up.

The next shot at [:16] I take the edit right as she turns her head.  The next shot at [:17], there isn’t much movement.  It’s also not a jump cut from the shot at [:16].  Back to a jump cut at [:18] and back to finding the movement to edit on.

After the music montage, I tell a little bit about her story.  We get to know our candidate.  Everybody has a story.  The prime objective is to just show the makeover; however, I wanted to tell a more of a story.  I am a storyteller, you know.

Several Jump cuts after this use as much movement as I can find in the shots the videographer brought back.

At [:39], the videographer does a swish zoom out.  I only use this once.  It’s too distracting for me to use a lot.   I liked using it here to break up all the jump cuts.

Transitional shot next at [:42].  Not everything has to be a jump cut.  A chance to bring the music up full as well.

I use the transitional to transition them into the next store.

Once I get into the store, I use more tight shots than I did before.  We are in a jewelry store, and jewelry is small, that just lends itself to tight shots.  How else are we going to see the pretty jewelry?

Another music montage at [:56].  Again I’m finding motion in the edits.

We move to another store at [1:03]. This time I simply use a pan down from the outside store sign to them entering for my transitional shot.

The sequence from [1:13] to [1:21] is my favorite part of the story.

Women LOVE trying on shoes.  I say it again.  Women LOVE to try on shoes.  Showing all these shoe shots is good.  Showing her moving her foot, in the mirror, her foot bouncing all shows happiness in her, and the viewer feels it.

This is followed by her asking her daughter if she likes mommies shoes, and then she says, “so fun!”  I don’t change the composition of the shots.  I don’t cut away. Why? Editing for emotion.

So what to take out of this post?

  • Learn the rules (guidelines) and break them (appropriately).
  • Use motion to help with your jump cuts
  • Re-size shots to change composition a little to help with jump cuts
  • Jump cuts are fun, but don’t go overboard.  Too many become distracting.  Find a balance.
  • Still, try to tell a story
  • Remember, emotion first. That overrides all else in editing.

Thank you for reading.  Please follow the Edit Foundry on Facebook

Keep it simple with graphics and text in video editing

An essential element of storytelling is the use of text and graphics.  Often you’ll be asked to be creative when a visually weak story comes your way.  A good video editor has ideas always ready to go; simple ideas.  This story was produced over 15 years ago.  The lesson is simple; graphic and text elements can add to your story.  Just a few simple effects can enhance a story.

In my time in a broadcast newsroom, one of my favorite types of stories to edit was an investigative story.  I was always challenged with stories that weren’t full of visuals.  This is one of my favorites from my time at KUSA.


This story is an investigation of a sheriff’s misuse of prisoners.  Time is going to be a factor in this story.  So you’ll notice me telling the viewer what time it is relative to the video. The first time I use text is at [:14]


 I put the time up in the top left corner.   I put the time on two layers, I just made the text bigger and slowly dropped the opacity on the 2nd layer.  The reason I did the outline text is simply I wanted something to grab the viewer’s attention to they see the time.

The next time I use text, there’s a lot more going on.  The mugshot and the stack of arrest records were created in photoshop. The documents are at an angle. I l like to create depth any chance I get visually.

I keep it simple. The text I’ve generated is moving slightly as well as the arrest records and mugshot.  I think the movement is critical.    I pull out the arrest record slightly to imply they are coming from those papers, which they are.

Also, notice in the upper left is a cutout of the prisoner.  This is a super simple element that can quickly be created in photoshop.


You see a cutout of a prisoner more prominently in this shot.  See him in the middle of the screen?  This was also accomplished in Photoshop.  Very easy to do, I do the same thing here again.  Bringing mugshot and arrest record forward.  Notice you also see Thaddeus in the background.  I still see these same tricks in news stories today.  What works, works.


I have 8 layers of video.

  1. The shot of the 3 prisoners all blurred
  2. a cutout of the prisoner the reporter is discussing
  3. The Mugshot
  4. The text of the prisoner’s name
  5. A layer of the arrest record
  6. A layer of the arrest record
  7. A layer of the arrest record
  8. Text highlighting convictions

In all three of those, the position of the mugshot and arrest record is simply so you can see the cutout of the prisoner in the background.


I use time again here.  Same idea as before.  Keeping it simple.


I didn’t create this graphic, the graphics department did.


I did create this graphic.  Again time is part of our story.  I do a simple stretch of the titles. The times come in the same way as I’ve been doing the whole rest of the package.  I blur the left side of the screen.  Why? Prisoners are on the right side of the screen, and the left side is an excellent place to put the text.


One last thing I want to talk about in this post.  I created this wipe as a transition. Why?  I’m not a big fan of the stock wipes in any NLE.  So I decided to create my own.  Try crafting your own wipe.

Thanks for reading.

Every Edit in Video Editing Could be a Transition

Every edit you make in video editing could be a transition, a cut, a dissolve, a wipe, all transitions.  A sequence could be a transition.  A pan could be a transition.  A person walking across the screen could be a transition.  Anything that advances your story and takes the viewer to another location, Time, or space is a transition.

Transitions can change the mood in your story.  Every edit should advance your story.  Every transition should have a purpose.  I am not a big fan of wipes.

I love Star Wars.  The Empire Strikes Back is one of my top 5 favorite movies of all time.  I understand why there are silly wipes in the film (they wanted to harken back to the black and white tv serials).  The reason I point out The Empire Strikes Back is it’s still one of my favorite movies despite silly wipes.

If you use a wipe or two in a story, it’s not a bad thing.  Just think about which wipes you use and if they’ll distract from the story. Wipes draw attention to themselves.  A good editor tries to hide his edits.  There are, however, times when transitions like dissolves are necessary.

The story for this post is The Ocean Carries Meaning.

I’ll break down the story and talk about transitions.  I’ll explain why I used a dissolve the way I did and what are some other transitional elements in the story.
The first 4 shots of this story I use dissolves.
The first two shots of the ocean are compositionally similar.  If you cut those two shots together, it’s a compositional jump cut.

What is a compositional Jumpcut?  Compositional Jump Cut is when you cut two shots together with similar visual perspectives together.


Look in the middle of these shots.  See where the ocean meets the horizon?


In each of these shots, that line is virtually identical.  Another thing that’s similar in perspective is the amount of sky relative to the ocean and sand.  The sky shares the same amount of space in both shots.  If these two shots were cut together, I would refer to them as a compositional jump cut.  Compositional Jump cuts, by the way, is something I came up with.  I’ve never actually heard or read that phrase.  I just think it’s an easy way to explain why you don’t cut these kinds of shots together.

So, why didn’t I choose another shot?  I wanted to show that two beauty shot and didn’t want another shot.  It’s as simple as that.  I tried to make these two shots work, and using a dissolve I felt was the best way to do that.

From the 2nd shot above to the first Time we see Tom [At 09], I use dissolve again. These two shots actually cut together fine.  Why did I dissolve here?  It’s a feel thing.  I just felt like I needed to keep the dissolves going as almost a theme at the beginning of the story.

Sometimes multiple dissolves simply are there because they are complementing each other.

From Tom coming down the ramp [At 12], I dissolve to the interview shot.  Why?

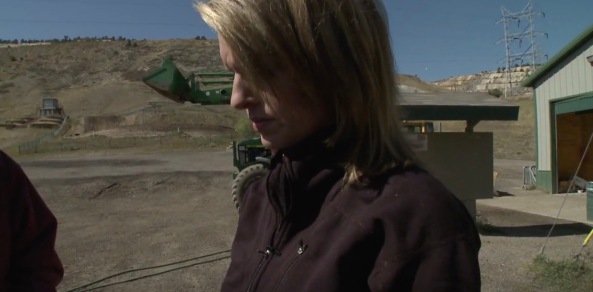
Because they are both tight shots. Cutting those two shots together would create another compositional jump cut. Out of the interview, to the reveal of Tom [:17] in a wheelchair, I cut.  From [:17] to [:35] I cut because of sequencing.  At [:35], I cut back to the interview.

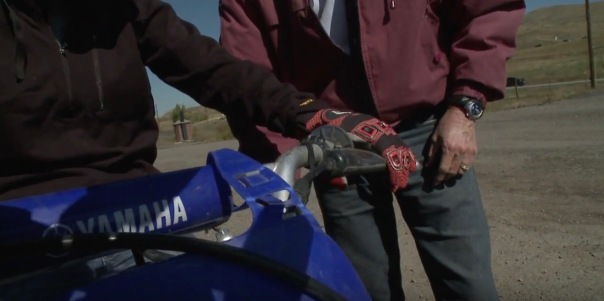
You just see the wheelchair, so the cut works fine. At [:37] is a tight shot of Tom’s leg, and I use some natural sound to transition to Tom in the swimming pool training.

Natural sound can be a great transition.  No need for a dissolve or wipe.  The natural sound does the trick for the story.  From here to [:48] is a sequence of Tom training in the pool, which all cuts fine.

At [:49], I dissolve from Tom’s training to a wide shot of the ocean.

Looking back at this edit, these two shots cut together just fine (if I’d chosen that).  I wanted a dreamy feel.  It’s Tom’s dream to dive, so from training to the ocean is almost a dream.  The dissolve helps convey that feeling of a dream.

Why didn’t I dissolve into the training?  Training is something he has to do, but it’s not his dream.


From [:51] to [1:12] are cuts.  It’s a sequence of Tom on the boat, and then a reporter stands up.  From the reporter stand up back to Tom, I dissolve.  Why?  She’s talking about how he got paralyzed.  I want to create a feeling of a transition of Time.

Dissolves can create a transition in Time

I Dissolve [1:26] from the interview back to Tom, getting ready to dive.

Again part of creating a dreamy feel. From [1:28] to [1:55], I’m cutting with sequencing.

At [1:58], I dissolve, and 3 more dissolves follow to [2:07] Again, back to the dream of diving.  I’m continuing with creating that dream feeling. From [2:09] to 2:38], I cut. I’ve already created the dream feels as he begins the dive.

Now I’m sequencing.  I don’t need to keep dissolving.  He’s living the dream, so you don’t need to create a feeling anymore. At [2:39], I dissolve from a wide shot of Tom underwater to a tight shot.


Why here?  I didn’t like the way the shots cut.  I’m kind of anal when it comes to matching action.  At [2:48], another dissolve. Same reason, the match action doesn’t cut right.  So, sometimes I dissolve simply because I don’t like who two shots cut together.

Here’s a place where I’d rather dissolve than use a cutaway.  So why not just show a cutaway?  First of all, the reporter is talking about Tom.  So, no cutaway would be relevant.  Second I try not to use shots unless they are relevant to the story.

Earlier I showed a cutaway of a fish [2:20] because it’s relevant to the story.


At [2:55] is another dissolve to an interview.  This is another feel thing.  I’ve just done two dissolves of Tom underwater.  Yes, I’m dissolving because I don’t like how the shots cut together. These two dissolves I’m again creating that dream come true feeling
Another dissolve just felt appropriate here [2:55].  It’s a feel thing.  I’m actually amazing myself explaining feel here.


At [2:59], I use sound as my transition.  I go from the interview to a sequence of Tom coming out of the water. From [2:59] to [3:24], I sequencing again, so I cut.


At [3:18], I bring up the natural sound of the boat. Again, using sound as a transition.  I’m telling the viewer the boats moving, and they’re on there way back.


At [3:24], I dissolve from a shot of the bird flying next to the boat to Tom on the dock (it’s a tight shot of his hand)


This dissolve is simply a time transition dissolve. The rest of the story finishes out on the dock, so I sequence.  No reason to dissolve anything here.

Transitions are critical to every story.

They are the tool that moves the story from one place to another.

They are also a tool to help set a mood.

Thanks for reading.

As always, I love comments.

Match Cuts and Hiding The Edits

You see match cuts all the time;  movies, television shows, and commercials contain match cuts.

Take this Heineken commercial for example

At [:13], you see match cut of the gentlemen in pink juggling the beer in glasses.

At [:18] is a match cut of the gentlemen throwing beer bottles from the stage to the men on the couch.

At [:30] is a match cut of a man opening bottles of beer.

Match cuts are an edit that connects two shots together via the action within the two shots.  Editors who are meticulous with match action understand how edits work.

The idea is to edit to shots together using the action within the shot.  Having movement in both shots, editing on that movement hides the edit.

In the commercial you see
The action continues in two uniquely composed shots
• It appears as if the shots are done with two different cameras rolling at the same time

• It’s an easy way to create a very clean looking sequence
• The match cut edit hides that there is, in fact, an edit
Editing two shots together on a movement will often make the edit invisible.  Good edits are invisible edits.  Good edits are edits your audience doesn’t notice.
Our story for this post is Michaela.

There a lot of match action in this story. I mean a ton.  I mean…well you get the point.

The beginning of the story is a sequence of Michaela and her mom in the kitchen.  Within that sequence I use match cut from the shot of Michaela tight at [:11]

to the wide shot of her and her mom in the kitchen.

Match cuts make edits very smooth.  Match cuts are not always made with a person, you can use an item.

In this next example, you see Michaela lifting the weights and then begin to put them down.  She doesn’t complete the action of the weights going to the ground in this shot.

In the next shot, you see the weights land on the ground completing the action.

When the barbell leaves the frame, your eye naturally dropdown.  Your eye expects to see the barbell hit the floor.  The match cut is very natural.

Here is another match cut beginning with the barbell on the ground, and then Michaela picks it up.

I make an edit while the barbell is moving up and out of frame.  The next shot, you don’t see the barbell right away.  You do see Michaela coming up and then the barbell.  So the action completes in the second shot of the sequence.

It looks like what you would see if you were in the room with her.  This is one of the tools to help take your audience to your story.  When Michaela drops the barbell, I again have a match action shot at [:38].

This is a simple three-shot sequence with match cuts connecting each shot together.

Here is another three-shot sequence with each edit connected with match action [:42].

Michaela comes up with a machine, takes the weight, and does a squat.

Starting at [1:22], my match cuts go into overdrive.  Can you tell me how much I like to match cutting?

I try to use Michaela’s movement of starting and stopping points for my edits. Here’s another one at [1:44]

Screen Shot 2020-04-05 at 4.54.40 PMScreen Shot 2020-04-05 at 4.54.58 PMScreen Shot 2020-04-05 at 4.55.11 PMScreen Shot 2020-04-05 at 4.55.26 PMScreen Shot 2020-04-05 at 4.55.43 PM

Michaela’s entire family is at the weight-lifting competition. From [1:41] to [2:03] is all match action except for one cutaway of Michaela’s mom.
I had a lot of fun putting this story together.  I had even more for honing my match cut editing abilities.

Putting Images Together in Video Editing to Tell the Story

You have to put images together in video editing to tell a story.  You’re a storyteller.  It doesn’t matter if you are editing a news package, a documentary, a film, or an online feature using stills, It’s all storytelling.
Putting the images together to try and tell a story is video editing.  Every edit should be made for the story.  Before sequencing, action/reaction, movement, eye trace, or continuity, there is the story (See guideline of six for more).

You learned about telling stories with pictures when you first started reading.  When my sons were little, I would have them read to me.  They were taught when they don’t know a word to look around at the pictures for clues.

As video editors, we need to help the audience with clues.  We need to give them picture clues.

When the wild things “made him (max) king of all wild things,” Maurice Sendak shows a picture of this happening.

As storytellers, we can take a cue from when we first started to learn about stories.  We read them and look at the pictures.  The pictures help the stories make sense.  Take this basic idea and apply it to video editing.

The following story I edited several years ago about a snowstorm here in Denver.  It does not matter if you edited a story yesterday or 10 years ago, the images still have to make sense with the story.
Please watch More Than Just An Inconvenience.

The entire story, my goal (and usually my goal with every story) is to find pictures to help tell the story.
The very first line of track from the reporter is

This was the end of the line.

And my image is

In the next three shots, I’m just trying to match the pictures and the words.

Instead of an interstate highway


I-70


Was a dead end road.


After the reporter track is a soundbite

I’ve been doing this for 30 years, you get…you know this stuff happens driving a truck. And it’s going to happen sooner of later and more than once.

I cover the second half of his soundbite with a truck with snow on it.


The shot supports the story and helps tell the story.

The next piece of track is

But twice in a week

And I show this


Multiple trucks in the shot.  The closest I can get to some kind of symbolism of twice.  I still think this shot advances the story.
The story continues

Truckers pass the time


with bottomless cups of coffee,


and John Wayne on the TV.


I’m making every effort I can to show what the reporter is talking about.

Now some make think I am too literal with my editing of the story.  In the case of a simple general news story, I want to help the viewer understand the story as best as I can with the images I’ve been given.  As you develop your skills, this is a pretty easy way to make sure your stories are making sense to the viewer.

Thanks for reading.

Shawn

You Better Know Your Trim Tools for Video Editing

I’ve been editing on non-linear systems since 1997.

OLYMPUS DIGITAL CAMERA

Learn your trim tools.  Please learn your trim tools.  Make yourself a better video editor.

Every time I learn or re-learn an NLE, I make sure I understand the trim tools.

I don’t care which NLE you’re on.  You better have an excellent grasp of trimming.

I think this is THE MOST essential set of tools on an NLE.  Are you with me?  I’m trying to make you better.

I use the trim tools every time I edit, EVERY TIME. The trim tools make an editor’s life easier. Trimming is polishing your edits.

Screen Shot 2020-03-30 at 1.25.40 PM

I think trimming is one of the hardest concepts to grasp when you’re learning about non-linear editing.

What is trimming?  I took this definition from Final Cut Pro HD Hands-On Training by Larry Jordan.

“Trimming is the process of removing, or adding, frames to the beginning and end of your shots so that the edits flow naturally, maintaining your story, without calling attention to your editing.”

So why should you trim?  What’s a great benefit?  These are the tools that make your edits better, and it’s quick.  Eventually, it’ll make you better.

I’m going to speak about trimming in general and why and how.

I used to edit on a non-linear system very linear-ly.  Meaning I would mark an in and an out and place it into the timeline.  If I didn’t like the edit, I would undo and reset mine in and out.  THAT’S A WASTE OF TIME.  The material you want is already down in the timeline.
Once you place clips onto the timeline, you should never go back to the preview window or re-load the clip ever.

If you don’t like the IN, then trim it.

I’ll use the story, Swinging on the Trapeze on my YouTube site to show you how I utilized some trim tools in the edit.


At [:21] into the story, you hear the beginning of a sentence from the gentlemen helping Kellie with the harness.  He says, “It’s gonna be…, then I show him.

Screen Shot 2020-03-30 at 1.28.20 PM

I place the edit of Kellie and the gentlemen down on the timeline.  I then ripple the video of the woman on the Trapeze just over this new edit.  I made a J cut (Whoohoo!).

Screen Shot 2020-03-30 at 1.29.04 PM

Simply select the edit you want to extend.  In this case, the end of the clip that has the woman on the Trapeze (ONLY THE VIDEO). 

In Premiere Pro I love I can just hold down the option key, and I can select only one track (basically unlinking a video and audio track)

At [:35], I make another J cut.  You see other women on the Trapeze.

Screen Shot 2020-03-30 at 1.32.27 PM

And you hear Kellie say, “So this’ll keep..”  and then I cut to Kellie after that.

Screen Shot 2020-03-30 at 1.32.36 PM

Between these two shots, I select the edit.  I choose the rolling tool and drag that edit forward to where I want it to be.

At [2:06] is a match-action sequence of Kellie swinging on the Trapeze.

Screen Shot 2020-03-30 at 1.36.29 PM

The 2nd shot in the sequence is Kellie swinging from the platform and then all the way back to the platform.

Screen Shot 2020-03-30 at 1.36.37 PM

I’m confident the action is matched here.  But maybe I want to tweak it a few frames.  I like my duration of the clip (two seconds) I’ve laid down.  I want to slip it a few frames.

Meaning I’m going to change the in and the out with one tool.  I’m going to zoom in to the clip on the timeline,  select the slip tool, and drag the clip forward and backward until I like my new in and out point while maintaining my duration.

Screen Shot 2020-03-30 at 1.38.10 PM

The Slip tool works great for a situation like this.  Trying to help with your match-action in a sequence.

Screen Shot 2020-03-30 at 1.38.16 PM

Slip, roll, extend edits are the easiest I think to try and explain.  A ripple while isn’t any more complicated; it’ just a hard to explain in a blog.

What do I want you to learn from this entry?  The next time your editing and you want to change something, use a trim tool.  Sometimes just playing around with the trim tools are your best way of learning.  I still discover new uses for each trim tool everyday.

Play and learn.

Thanks for reading.  Don’t forget to like The Edit Foundry on Facebook

Imitate The Eye

I first heard the phrase, imitate the eye, from Lou Davis.  Lou is a photojournalist in North Carolina.  “Capture the world as your eye sees it,” he’d say.  I’ve taken this and applied it to my everyday editing.

When you are at an event.  What does your eye focus on?  Put those same shots together on the timeline.  You’re now basically editing via imitating the eye.

Please watch Run Fast, Shoot Slow.  This is a natural sound video I edited several years ago.

Let’s start with the opening sequence. I’m trying to make edits as close to the action as possible.  So, a gun is shot, and it recoils immediately. Like in the edit at [:12]

>

and the edit at [:15]

Notice I don’t sit on the shot for more than a few frames before the action happens.  Once the action happens, I move on to another shot.  I’m attempting to imitate the eye as best as I can. I still need the viewer to comprehend the shot.  If you were there at the shooting range, your eye would probably move faster.

Would your eye capture everything from the beginning?  You would catch several things in mid-action.  Just like many of my edits.  Go back and look at my edits from [:10] to [:16].

Notice some of the shots the action of the gun being fired has already begun.  Imagine if you were there.  Wouldn’t your eye ping-pong around the shooting range just like that?  Q

Please watch the story again and notice just how often I take an edit right on an action of just after the action has started.

Here are a few examples;

at [:17], the car door is already opening.

At [:27] running onto the firing range.

At [:41] going over the obstacle course.

The shot at [:47] I start the edit well after the participants have started running.  If you were on top of the hill, watching this is where you head my turn and pick up the action.


Not every edit in this story follows the imitate the eye concept.  I still have to tell the story.  I do back-time natural sound moments, and I’m going back and forth with the interview, and there are a lot of other elements to the edit.  For this post, I just wanted you to pay attention to your eyes the next time you are out shooting.  When you come back to edit, try thinking about this concept.


Thank you for reading.


She’s nervous. As an editor it’s my job to help convey that in the edit.

You are an editor.  Occasionally…. wait…I’m mean you’ll always have to convey emotions when you edit.  Sometimes it’s easy.  Your subject is laughing, crying, showing emotion, and it’s easily seen and understood.  Quite often, it may be more subtle, and you’ll need to help convey the emotion with the help of some editing tools.  Here is a story I produced and the tools I used to help express how Kellie felt as she went into a shark-tank with sharks.

The story for this post is We’re Going into Their World on my Youtube page

This is from the ‘Extreme Kellie’ series I produced for KWGN. In this story, Kellie MacMullan (now DeMarco) takes a dive with sharks at The Aquarium in downtown Denver.

The first thing I did before I edited this story was to find music.  Using something from the soundtrack to Jaws or any other scary aquatic movie wouldn’t be appropriate. It’s also a cliche.  People already have an emotional attachment to the theme from Jaws.  I want to help the viewer understand how scared Kellie is to actually do this all the while, not making a mockery of the dive. Music isn’t an easy thing for me. I’ll often spend hours and hours listening to finding the right music for a story.

For the opening portion of the story, I choose something the average viewer wouldn’t recognize.  The song is Heed Our Warning from the Transformers: Revenge of the Fallen The Score.  I start the story with music up full for 3 seconds to establish mood.

The 1st five shots of the package are all from the HD underwater camera.  Notice all 5 shot I take the edit with the shark predominantly in the middle of the screen.  I always have eye trace in mind when I edit.  I want to keep the viewer’s eye right in the center of the screen for all these shots.  Why?  The impact of the shark in the 5th shot shown here…

That shot really grabs the viewer’s attention.  I bring the music up full for just a beat during this shot to give it just another second of impact.

At [:11] When Shane Taylor, Kellie’s instructor says,

“We’re going into their world, you know I think if you just respect what they’re to do, things will go really, really smooth,” I take a shot from above the tank.  I added a slow push-in to this shot.

Why do I choose this shot?  During the interview at [:11], Shane looks down. What’s he looking at?  If you place the camera at his eye level and pan it down, this is what you’d see. This is another example of how I use eye trace.  I know this post is about helping convey emotion, but there are always other elements going on in editing, and I like to point those out.

At [:24] I have a shot of a shark swimming shot from above,

followed by a shot of Kellie looking into the tank.

Look at this shot closely.  I wait for Kellie to have some expression on her face.  I want to show the viewer she’s nervous.  I then cut back to the sharks swimming from above. I’m following the logic of eye-trace.  Kellie is looking at something, I show the viewer what she’s looking at (eye-trace).  But it’s not just eye-trace. It is also finding something in the video to show the emotion of the moment.

At [:32], I show Kellie, and she says, “I’m nervous.”

The next shot I choose is that of a shark opening its mouth.  Wow, looking back on that edit, I love it. I’m really conveying the emotion of the situation.  The shark opening its mouth really works here.

With this shot, I bring up the music full again. Why did I cut away from Kellie to this shot?  In the sequence of Kellie in the water, I didn’t like my choices of shots.  They were either jumps cuts or cutaways, adding nothing to the story. I’m trying to keep the viewer engaged as much as possible.  Cutting a sequence of Kellie dropping into the water isn’t nearly as powerful as cutting back and forth from Kellie to the sharks.

At [:58] I bring the music up full again and show a great shot of Kellie.  With the music up full and her expression, you can really feel the tension she’s feeling. That’s good editing.

Notice coming out of this shot at [1:00], I wait until she slightly moves her head.  The next shot wide, her head continues to move.  I like using match-action to help hide edits.  Little things like this make an average editor better.

At [1:25], Kellie goes underwater, and I change the music. I’m now using the song Grand Central from the soundtrack to the movie K-Pax.

This song has a feel of discovery.  I want the viewer to realize Kellie is not so nervous anymore.  She is intrigued by her dive.

I bring the music up full several more times.  The shots are beautiful. Kellie’s taking this all in. I want the viewer to take it all in too.  So, I let a few shots just breathe.

This was a fun piece to edit.  Great underwater shots to choose from.  I kept editing very simple.  Trying to let shots breathe.  Simple music and notice no dissolve.

Thanks for reading. Don’t forget to like The Edit Foundry on Facebook.

Make Your Editor Happy with Screen Direction

Have you ever crossed the axis, and violated screen direction? Stop it!  

Ok, there are about 15-thousand reasons why you’ll do this. Relax, I’m here to help.  

A quick review just in case you don’t know what an axis in video production is and a few definitions.

Action Line – This imaginary line follows the direction that the people or objects are facing. 

1200px-180_degree_rule.svg

If you keep your camera and people (or object) on one side of the action line, screen direction is never a problem.

  • Frame Left – indicates movement towards the left side of the screen.

  • Frame Right – indicates movement toward the right of the screen.

The story I’m going to use for this post is Slow, but Steady found on my Youtube page

The story starts out with a video that was given to us by Thunder Valley Motocross.  It’s a montage of shots from various races.

Even though this was given to me, I edited it with a screen direction in mind. Notice all shots from [:00] to [:11] are frame left.

This slideshow requires JavaScript.

 There is one shot at [:11] in the full music montage I take from frame right.  Why?  When I’m in montage mode, I like to break the rules and go for the coolness of shots.  I liked the way the shots from frame left, and frame right worked.

After that montage, I go back to all shots frame left until I take the interview full at [:16].

Then all shots are frame right, back to the interview. After that, I tried to cluster several shots in which action is coming mostly straight at you. Some are frame left, and some are frame right, but because they are mostly head-on, I didn’t feel the direction change was too drastic to be visually unpleasant.

At [:38] is a shot of Kellie on the bike, followed by a shot of the wheel, followed by Kellie on a motorcycle going over a bump.  

I break screen direction with all three of these shots.  It works because they are all tight shots, I haven’t established any real screen direction, and it’s a mini-montage.

I want you to respect the guidelines of the screen direction.  I also want you to be creative and figure out ways to violate screen direction without it being visually jarring.

At [:40], Kellie and David are talking, getting her ready to ride.  

Screen Shot 2020-04-02 at 4.05.05 PM

The action line keeps David frame left and Kellie frame right. Pretty obvious. So, a bad idea would have been to all of a sudden start shooting from the other side of the axis.  

That would of put Kellie on the left side of the screen and David on the right.  That’s the type of screen violation you do want to avoid.  Keep people on the same active line unless you have a reason to break this.  Don’t just break your axis in this type of situation without a good reason.

Oh no!!! At [1:02], they switch sides.  

Screen Shot 2020-04-02 at 4.08.11 PM

Kellie is now frame left, and David is frame right.

Cutting those two shots together with the reverse in screen direction looks terrible, feels terrible, and I won’t do it.

Lucky for me, I have a pan-up that helps me get out of my reverse frame problem.  So, now the screen direction doesn’t look so bad.  You are going to run into screen direction problems all the time.  Find a solution.  It’ll make you better as an editor.

If you’re a videographer and this happens, remember to shoot yourself out of the problem.  You and your editor (again, maybe you) will thank you in the edit bay.  

Now, we cannot control David moving around, and sometimes we can control screen direction problems in the field. As an editor, it’s your job to make sure this doesn’t get in the way.

How do you do that?  

At [1:10], Dave is frame left.  I wait until he’s out of the shot to make the edit.

Screen Shot 2020-04-02 at 4.09.44 PM

Dave is now framed right.  I use a shot of Kellie’s hands and their torsos to make the jump less harsh.

Screen Shot 2020-04-02 at 4.10.24 PM

When Kellie finally starts riding the bike, she rides away from the camera.  Notice I take the edit when she slightly leans left to get her around and back.

From there on in the sequence, she’s always riding frame left.

Screen Shot 2020-04-02 at 4.12.10 PM

At [2:00], she reverses direction.  I use another pan up to help me get out of this looking too jarring.  Two pan-ups to get me out of screen direction problems.  Remember that.

The next 3 shots are frame right.  In the third shot, I allow her to turn in the shot.

Screen Shot 2020-04-02 at 4.12.45 PM

And now I can get her going frame left.

Screen Shot 2020-04-02 at 4.13.30 PM

At [2:22], I let her turn in the frame again, allowing me to get her going screen right again.  The reason why I turned her around back is that her final little post-interview she’s frame right.  I’m thinking ahead, making sure I don’t have a screen direction problem.  Yeah, you better be thinking ahead too!  

A 4 shot montage after the interview I break the screen direction rule (I mean guideline) again. Why?  I’m in montage mode and don’t follow the screen direction rule (That’s my own little rule or guidance).

  • Screen direction helps the viewer understand the visual realm you are creating.

  • The action line keeps people or objects on the right sides of the frame.

  • Imitate the eye.  People and objects don’t reverse screen direction in the real world, why do it in editing.

  • You can break screen direction, just understand the rule (or guideline) before you break it.

Thanks for reading.  Don’t forget to like The Edit Foundry on Facebook.